Regardless of whether you are planning a concrete slab garage, a shed or a wooden structure, you need to properly plan the entire process associated with its construction. What it should look like and what you need to remember when its construction becomes a real test for you?
Wooden or metal garages are structures that allow you to safely store cars and other valuables. They protect against the negative effects of weather, and also allow you to safely store valuable items. Learn about the construction stages of individual garage buildings.
Wooden garages – features
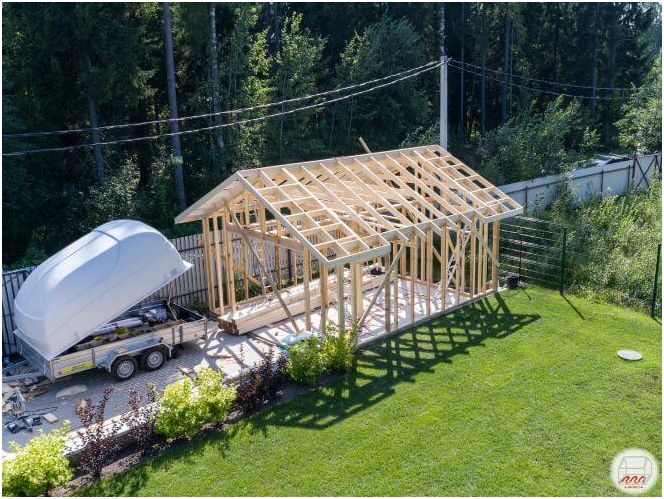
Such a structure should be well thought out so that problems do not arise at certain stages of construction. Regardless of whether you are planning a plastered or portable structure, gable or canopy, the first step should always be to prepare a specific location for the structure of the facility. At this stage, you should know the dimensions of the structure, so you can create a project of a suitable size.
For timber structures, you can choose from cobblestones, concrete or wood floors, and standard concrete blocks. The choice of base should depend on the weight that the floor will support. If you have a heavy car and plan to store other heavy items in your future garage, make sure you have a solid floor. In this case, the best solution would be a concrete surface..
After choosing a suitable floor, it is important to properly lay it on a flat and clean surface, where the concrete screed will be installed. The next step will be the installation of the formwork. Remember that before preparing the floor, it is important to know the dimensions of the object, as well as its possible layout. This is especially important if you are building a structure for two cars or for a car and other machines. Before starting work related to the construction of walls, it is necessary to process all wooden elements with special impregnations. Remember that every structural element needs to be impregnated. Before directly screwing on the wooden elements, they must be varnished..
The installation of a wooden building should begin with the correct foundation, which is a horizontal beam that lies on the floor. Fastened with metal anchors. It is worth thinking about insulation under the foundation. Another element is the pillars on which metal corners can be installed. A cap is attached to the top of the columns, which is the top of the columns.
The next step is to install struts, which will increase the stability of the entire structure. This is followed by the layout of the opening for any window frames, then you need to install a garage door, add side walls and a roof. At the last stage of construction, if you do not have the relevant skills and experience, you should transfer this volume of work to professionals.
DIY concrete garage construction – features
Building a concrete structure is a lot like building a wooden structure. The first step, which is to choose a suitable floor, is almost identical to the construction of a wooden floor for a building. After choosing a foundation for a concrete structure, clean the place where it will be located. Building a concrete slab structure does not have to be an expensive solution, it can be a really cheap alternative to concrete garage structures with brick walls.
In the case of a structure built with concrete panels, some are discouraged by the fact that such panels are most often created in the gray color typical of the garage. It should be remembered that they can be changed to another color at any time, because concrete slabs are a convenient material for painting with appropriate paints. In such a situation, it is worth choosing paints that will not only look great visually, but also provide an additional protective layer..
When building a concrete garage, where the slabs themselves are strategic structural elements, the most common concrete span dimensions should be considered. Slabs with a height of 50 to 60 cm and a length of 200 cm are usually found. In the case of concrete slabs with a height of 125 to 150 cm, the spans are 205 cm. This does not mean that concrete slabs of other sizes are difficult to access. Those looking to build a really large structure can look for concrete slabs up to 250 cm high and 205 cm long..
DIY aerated concrete garage construction

Design is the most important stage of construction. The project can be developed independently (with appropriate knowledge) or entrusted with the work of engineers. For simple projects, you can download it from the Internet. Next, it is important to correctly calculate the amount of building material so that the construction of a garage from foam blocks with your own hands does not bring unpleasant surprises due to a shortage or overspending of materials.
Among the main stages of construction:
- Design.
- Calculations.
- Preparation of building materials.
- Arrangement of the foundation.
- Walling.
- Covering a concrete box with a roof.
- Installation of doors, windows.
- Gate installation.
- Waterproofing.
- Warming.
- Finishing work.
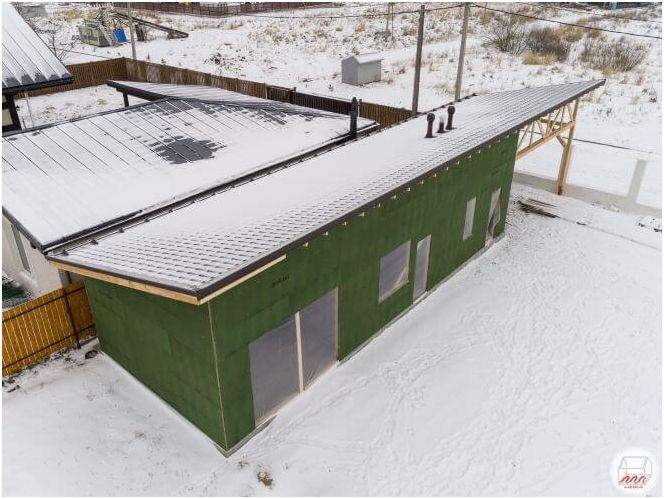
Building a garage from blocks with your own hands has many advantages. The main one is thermal conductivity, which is important for unheated rooms. With a high resistance of blocks to heat transfer, an acceptable temperature will be maintained in the building even without additional heating. It is only important to reliably protect the masonry from the wind so that its heat loss is minimal..
Insulation of the garage – what is worth knowing

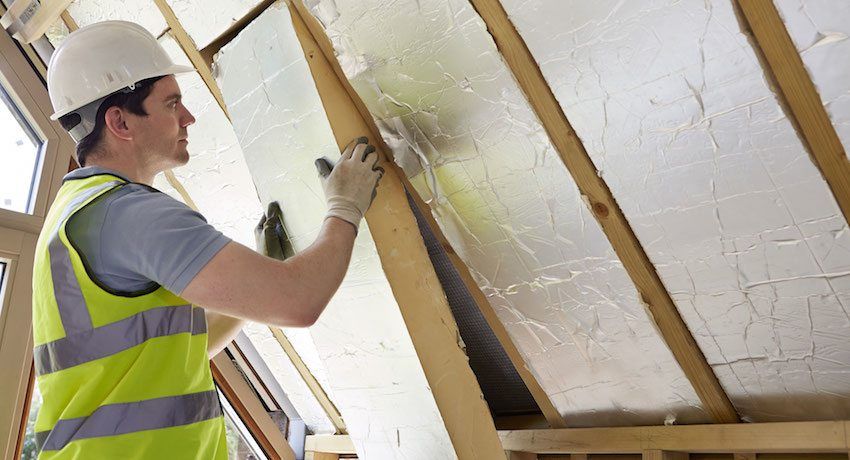
The climate in Russia differs in that during 4-6 months low temperatures prevail, which is not only uncomfortable for people, but also negatively affects cars. Due to frost and precipitation, the car can be severely damaged, so many people try to leave the car in the garage, where it is protected from negative impacts. However, if you carry out the insulation of the garage walls from the inside with your own hands or with the help of craftsmen, then in such a room the car will be reliably protected, because the insulated walls practically do not let the cold inside the building. That excessive insulation and the creation of room temperature in garage buildings is a waste of money. In addition, due to the temperature contrast, the machine body can become more susceptible to corrosion. It is also worth remembering about high-quality ventilation, which will remove excess moisture and harmful gases into the street..
The requirements for the thermal insulation of garage buildings are not as strict as for the insulation of residential buildings. If houses are practically not insulated from the inside, then in the case of garage buildings, insulating a garage from the inside with your own hands is effective, and sometimes even the only correct option. If the structure is located close to others, then external insulation is impossible. Some structures require double insulation, for example – metal structures. The only drawback of this method is considered to be a decrease in useful space. However, you can always use materials that fulfill their tasks with a minimum thickness. How to insulate the floor in the garage with your own hands, insulate the walls and what materials to choose – let’s talk further.
DIY construction of a warm garage – the choice of materials for insulation
Given the technical purpose of the building, the choice of materials for insulation is practically unlimited. It is possible to use different materials and to choose the right one, you need to study the advantages and disadvantages of each:
- Glass wool. Fibrous thermal insulation material, featuring fire resistance, strength, light weight, relatively low price. Glass wool installation is a simple task, even for inexperienced builders. At the same time, glass wool poorly resists moisture, therefore, requires additional waterproofing.
- Mineral wool. Material production is the process of melting basalt rocks. Mineral wool has good thermal insulation characteristics, but under conditions with excess moisture, they are quickly lost. The use of this building material is also practically impossible without additional insulation from moisture. Mineral wool can be used to insulate brick or metal structures. Compared to other materials on the market, mineral wool is the most expensive.
- Styrofoam. This material is often used for exterior insulation of houses, as it has a relatively low price. In terms of thermal insulation properties, foam is similar to mineral wool, but at the same time it is moisture resistant. For this reason, many garage owners often choose polystyrene for insulating structures. It is used to insulate various structural parts of buildings, from gates and ceilings to walls. It should be borne in mind that the foam belongs to the group of combustible products. Manufacturers supply to the market special grades of polymer materials with a fire retardant, a substance that provides self-extinguishing of a burning insulation that prevents the spread of fire.
- Penoizol. In its composition, it is similar to polystyrene, but at the same time it has the best characteristics. The material is used in a liquid state, it fills well any hard-to-reach places and cracks. It is worth noting the rapid drying of the foam, as a result of which an even insulating layer is created. The advantages of penoizol include resistance to combustion, moisture, durability, low price, as well as excellent thermal insulation characteristics..
To understand which material will be better, you need to carry out a comparative analysis of their characteristics, assessing the price, fire resistance and water resistance..
Wall insulation with foam or foam – stages of work
Building a garage on a site with your own hands is a difficult process that not everyone can do, however, a minimum of skills are required for insulation. You will need to purchase high-quality polystyrene or polystyrene foam, vapor barrier film, dowels with fungi, glue, as well as waterproofing material. You also need to prepare a knife for cutting slabs, a screwdriver, a hammer drill, an assembly gun (with foam), a bubble level from 1 to 1.5 m long.
Installation technology is not complicated:
- The surface of the walls must be cleaned of dirt and dust, treated with an anti-corrosion or anti-fungal compound. It is advisable to prime the surface of the walls, especially if they are iron.
- On walls made of concrete or brick, you need to glue a waterproofing film. It is possible to use both a special film and polyethylene or roofing material. We glue the joints, leave a margin of 15 cm on the ceiling and floor. In iron garages, the waterproofing step can be skipped.
- Apply glue evenly to the boards. Next, we glue them to the wall for waterproofing. Each element is additionally fixed with dowels with fungi (not used in iron structures).
- The thickness of the slabs must exceed 10 cm for walls made of concrete or brick, and 15 cm for iron structures. For the northern regions, the thickness of the material increases by another 1.5-2 times.
- After the installation is completed, glue is applied to the insulating material (in a thick layer), all joints and seams are coated. We put a special reinforcement mesh on the glue and on top of it we coat everything again with glue.
When the glue is completely dry, the walls are painted, plastered, finished with materials for interior decoration.