Different types of gates are used for the same purpose – restricting access to private territory. When choosing a product, you can be guided by different motives, but the main ones are simplicity in opening and closing, as well as space saving. Roller models correspond to both of these characteristics, while it is quite simple to assemble the sliding gates with your own hands: drawings, diagrams, design sketches are easily found on the Internet.
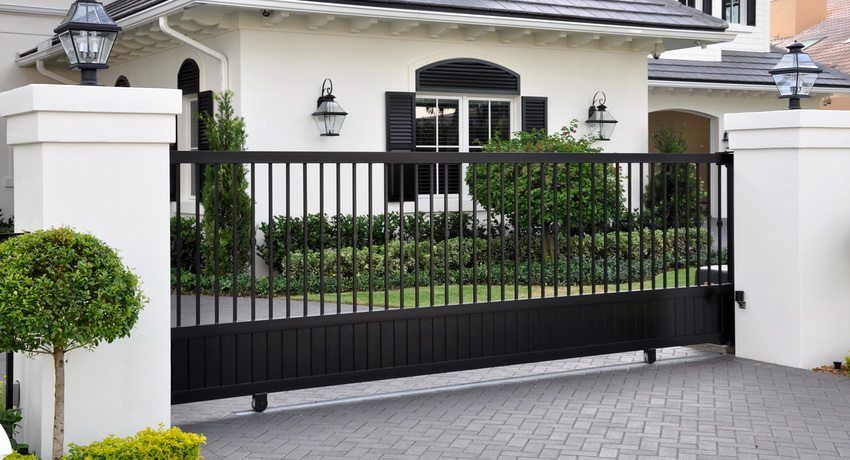
Sliding gate device
Retractable gates can be of two types – roller and rail. The first type of construction involves the use of roller bearings and is quite simple to manufacture. Rail gates today are considered obsolete and rarely used.
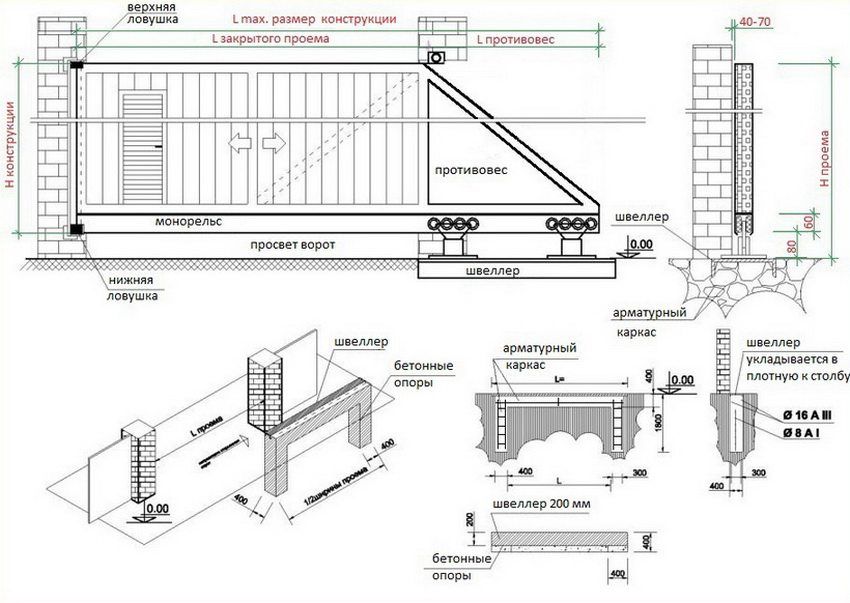
On the Internet you can find a large number of articles on how to make your own sliding gate. This will require minimal skills in the construction industry, a number of specialized tools and patience. First you need to know that any roller sliding gates consist of the following elements:
- support or trolley – cantilever part is installed on two supports;
- guide beam – takes on the load weight of the gate;
- lower safety device – takes the load of the support roller with the gate closed;
- upper catcher – reduces the level of sail structure;
- removable roller – is a support for the edge of the gate at the time when they are closed;
- the upper retainer or bracket – does not allow the flap to go sideways;
- stand – the basis for the supports, which move the sash.
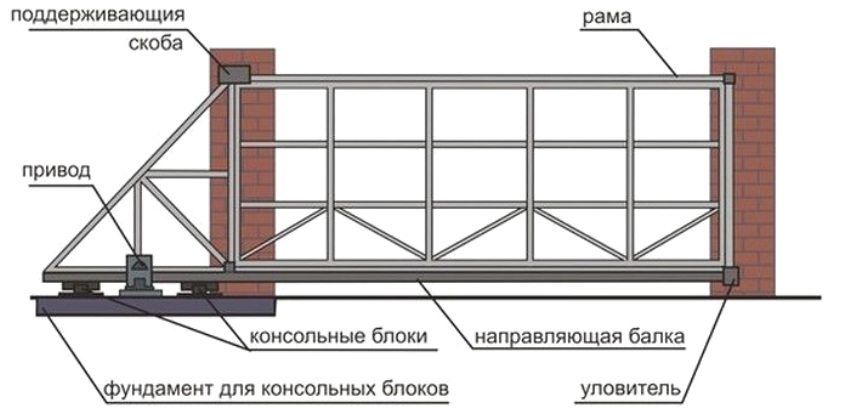
The installation of the gate must begin with the construction of the foundation, which will take on the main load of the structure. On top of it are mounted supports, on which the guide beam moves, the latter is welded directly to the sash.
Sliding gates can be driven manually or with an electric motor. Both types of construction imply the same mounting pattern.
Helpful advice! When choosing material for the valves, keep in mind that it must be sufficiently rigid and durable, since the whole structure is exposed to wind. In addition, the canvas should not sag under its own weight.
In the modern market there is a huge amount of spare parts from which you can assemble a sliding gate with your own hands. The main selection criteria are the width of the opening, the height of the valves and the total weight of the structure. You can also pick up parts using special programs on the websites of manufacturing companies.
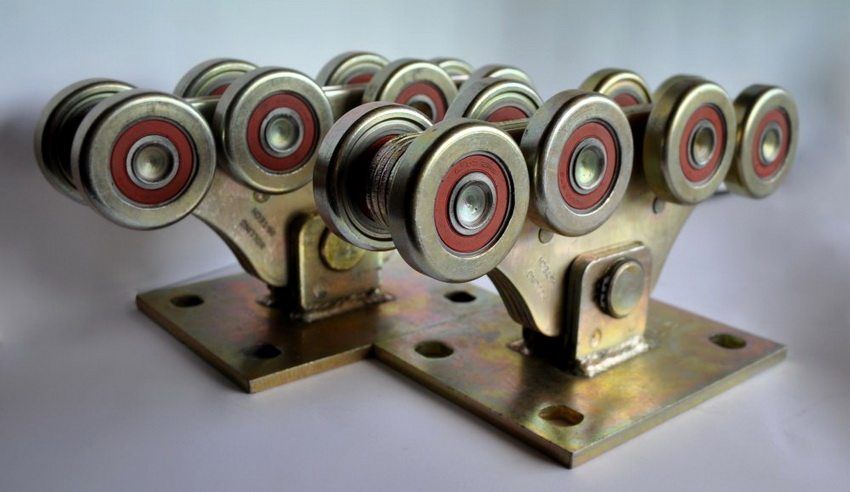
Particular attention should be paid to the gate, the opening width of which exceeds 5 m. In this case, the load will be greater than 600 kg, and for this you need a special set of components for increased loads.
If you decide to assemble a sliding door with your own hands on video, then you need high-quality components. First, according to the drawings, photos and videos of sliding gates with a mid-beam, you need to calculate the maximum load and other parameters, and then pick up sets of spare parts from the manufacturer you need. Below you can see the parameters of installation kits for different companies:
| Manufacturer | Sash weight, kg | Opening width, m | Beam length, m |
| Roltec MICRO | up to 350 | until 3 | 4.5 |
| Alutech | up to 450 | up to 4 | 6 |
| Roltec ECO | up to 500 | up to 4 | 6 |
Helpful advice! When choosing components, refer to ready-made calculations and a drawing from an experienced specialist. So you will not only save your time, but also get the best option of spare parts.
Door installation should always be carried out in a specific sequence:
- Creating a foundation.
- Installation of cabling, if you are installing a version with an electric motor.
- Installation of the gate itself and the counter post.
- Installation of automatic devices and gate check in action.
For each of the stages of installation of sliding gates with their own hands, photos and drawings in large quantities can be found on the Internet.

To install sliding gates, you need a number of specialized tools:
- Welding machine – it is better to give preference to the inverter model, it provides a good quality of the seam and does not spoil the metal.
- Air compressor – used for uniform painting of the gate. It is possible to carry out painting with a brush or roller, however with a compressor a layer of paint will be as even as possible.
- The Bulgarian and a set of disks – for cutting of metal preparations.
- Hammer, drill, pliers, tape measure, level, riveter.
You can download freehand drawings, schemes, sketches, and structures for hanging gates on many professional building sites. There you will also find a list of specialized tools required for the manufacture of one type of gate or another.
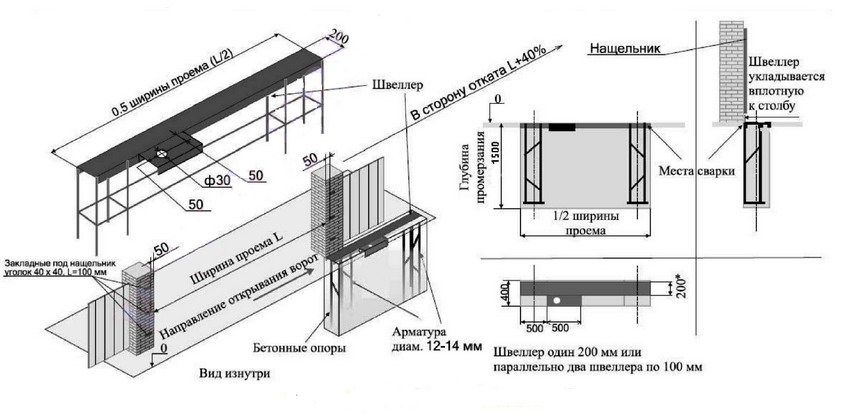
The first phase of foundation construction is pit marking. For this, a distance is measured along the fence of the site, which is equal to 1/2 of the gate opening width. The width of the pit under the concrete base – about half a meter in the direction of the site.
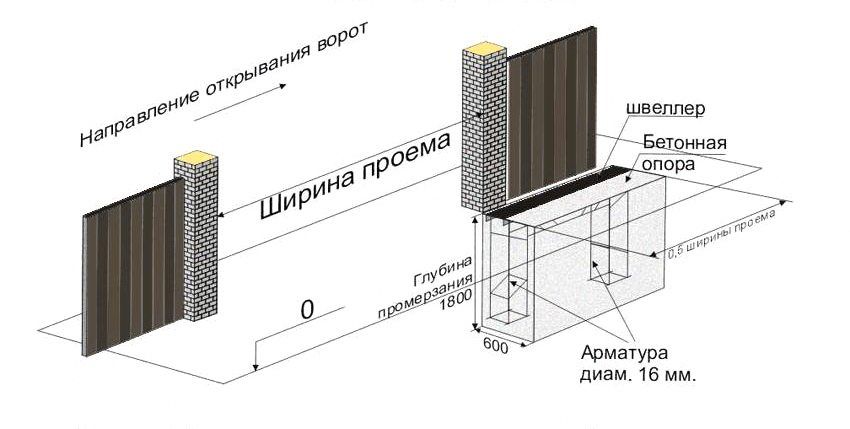
If there is such an opportunity, then it is recommended to use fence posts as support pillars. Otherwise, a counter pole is mounted, the pit under which is located opposite the pit for the foundation, and on the opposite side of the opening. In the case of installation of automatic gates, be sure to provide a place for laying electrical cable. As a casing, you can use a metal or PVC pipe with a diameter of about 25 mm.
Helpful advice! The soil in the pit is removed to the depth of soil freezing, that is, not less than 2 m.
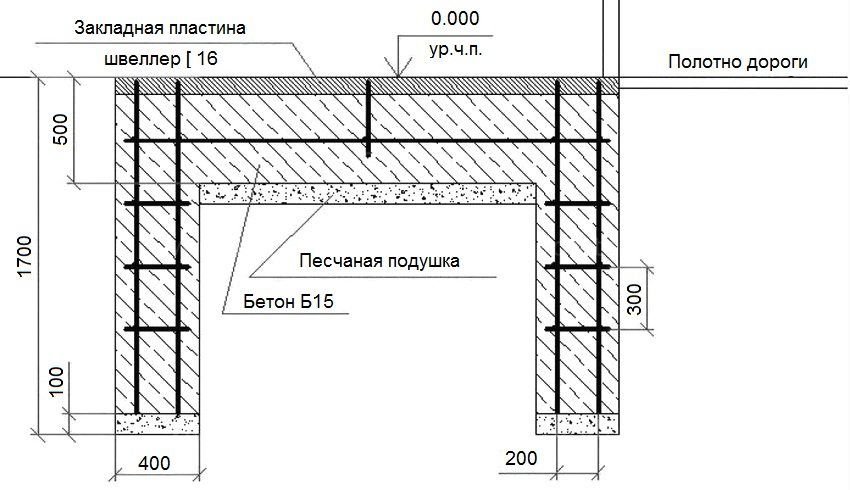
The inset element is made of a channel, to which reinforcement segments are attached to the bottom. The element itself is placed in a hole so that the channel fits as closely as possible to the fence post. The horizontal position of the channel parallel to the direction of opening the door should be checked with a level.
Concrete is poured over the embedded element, the level of which should be slightly above the surface of the element. After that, the concrete should be allowed to harden, it takes from 6 days. After solidification of the concrete foundation, you can proceed directly to the installation of the gate.
The method described above is the most common, but there are still a number of options on how to equip the foundation:
- The device of the pile monolithic foundation – two reinforced pillars, interconnected by a channel, are driven into the ground. This method is the most economical, since it does not imply the use of a large amount of concrete. For excavation with this method, you can use the most common garden auger. The depth of the holes for the supports should be at least 2 m and 20-30 cm in diameter. Each of the holes should be located as close as possible to the fence, and connected to each other by a small trench.
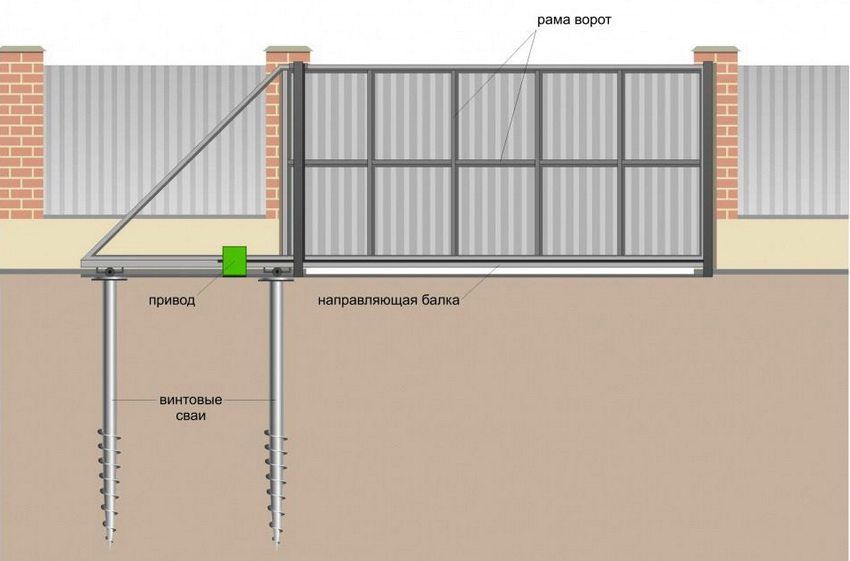
- Pile screw foundation. For its installation does not need to carry out land and concrete work, it does not take much time. As the name implies, such a foundation consists of piles that are driven in or screwed into the ground. In order for the piles to last as long as possible, they must be coated with epoxy or zinc coated.
When installing the gate to the cottage with your own hands, you must first perform the marking. To do this, a string is stretched along the opening line, indicating the trajectory of the sash. Then fixing the adjustment pads is performed.
After installation of the sites, it is necessary to determine the extreme positions of the roller bearings. To do this, you need to retreat 15 cm from the edge of the opening along the mortgage element and draw a tangent for the first carriage. The extreme position for the second carriage is calculated according to the following formula: 100 mm is taken from the length of the gate (with the cantilever part) along the surface of the mortgage element.
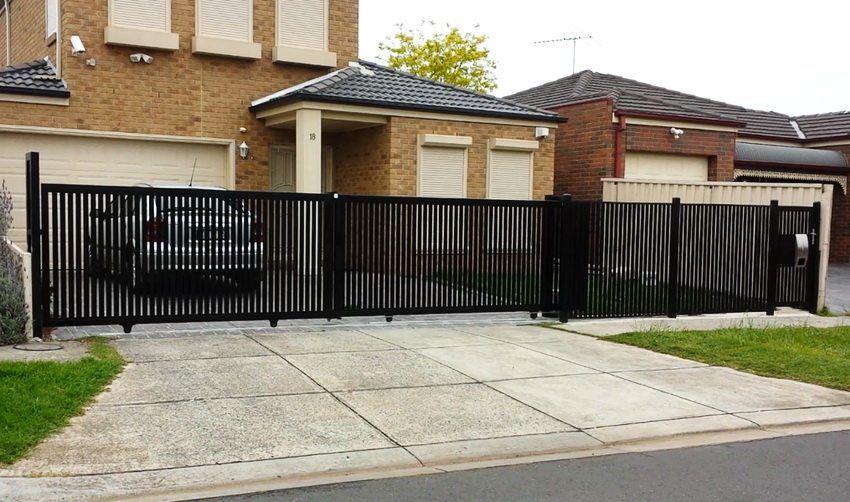
After all the calculations, you can proceed to the installation of a sliding gate with your own hands, video of this process, if necessary, can be found on the network. With the help of the welding machine, the adjustment platforms of the second carriage are welded, after which the sash is rolled into the opening and regulated.
The sequence of actions is as follows:
- The canvas is removed from the roller carts.
- Carts are removed from the adjustment platforms.
- Sites are welded to the mortgage element.
- Roller carts are fixed at the sites.
- The door curtain slides onto the carts.
- The gates are closing.
- With the help of a wrench is carried out fine-tuning and final adjustment of the valves.
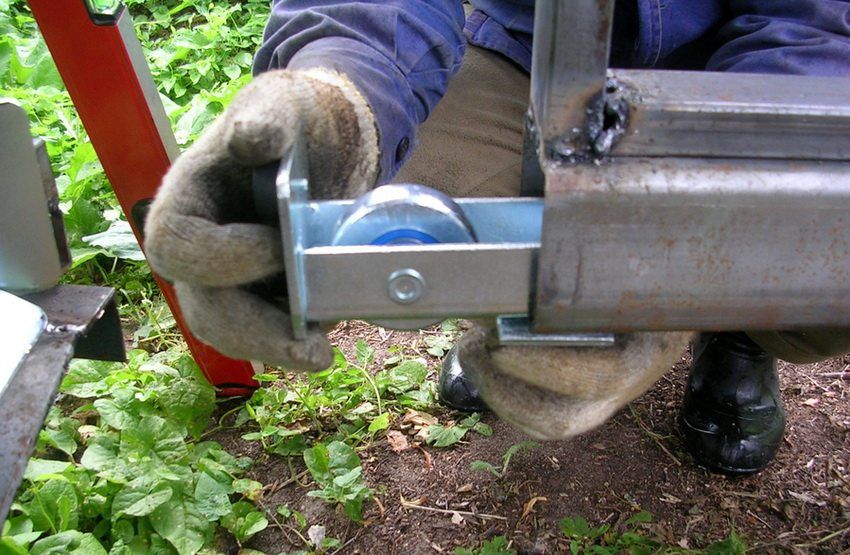
In order for the carts to be properly fastened inside the support profile, it is necessary to loosen the top nuts in the places of their fastening to the pads, and open and close the gates several times. If the flap moves freely enough, the nuts must be screwed back. If after that the canvas moves with difficulty, then it is necessary to correct the distortions of the carriages in the perpendicular plane to the movement of the canvas.
When the movement of the blade is adjusted, you can proceed to the installation of the end roller. It is placed inside the carrier profile, fixed with fixing bolts, after which the element cover is welded to the door profile. It can also be bolted, but welding in this case will be more reliable.
Helpful advice! In winter, snow may fall into the bearing profile, making it difficult for the sash to move. In order to prevent this from happening, on the inner side of the gate a welded profile cover is welded.
Drawings of sliding gates do-it-yourself also imply the installation of an upper retainer with rollers. In this case, the rollers should grip the top of the canvas, and the bracket should be directed with holes toward the support column.
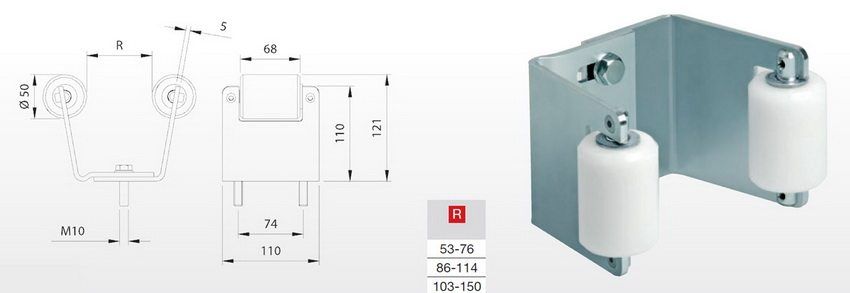
In some cases, to strengthen the canvas can be sheathed profiled metal sheet. The sheet is fastened to the canvas with the help of screws or rivets, the second method is more reliable. If you need to mount several sheets, they overlap.
An important element of the construction of the gate with their own hands (drawings, diagrams, sketches confirm this) is a trap. The lower catcher reduces the load on the roller carts when the door is in the closed position. Therefore, it is mounted with a fully closed gate. A bottom catcher is brought under the end roller in such a way that its bearing surface is above the level of the end roller.
The upper catcher in the closed position of the gate with its upper brackets should touch the protective corner of the front edge of the canvas.
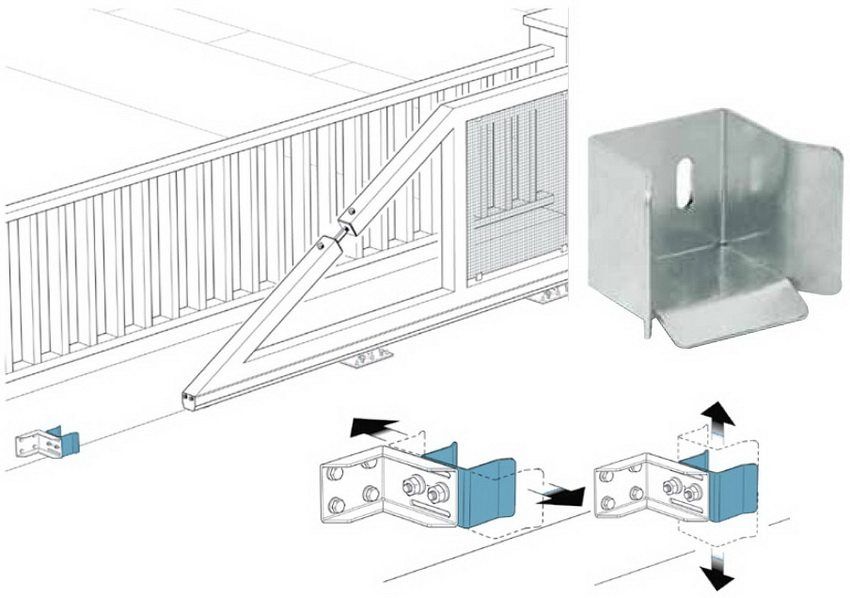
If desired, after installing the structure, the door leaves can be painted in different colors. The paint must be durable and endure with all sorts of adverse natural effects. In order to keep the layer of paint as long as possible, the surfaces should be cleaned with the help of a grinder or a skin, and then degreased with acetone.
After stripping the gate is primed. This can be done with a brush, roller or spray gun. The latter option is preferable, since it allows to avoid irregularities and streaks. After priming the painting layer is applied. After it dries, the staining is repeated. Different types of paint and in different weather conditions can dry from several hours to several days.
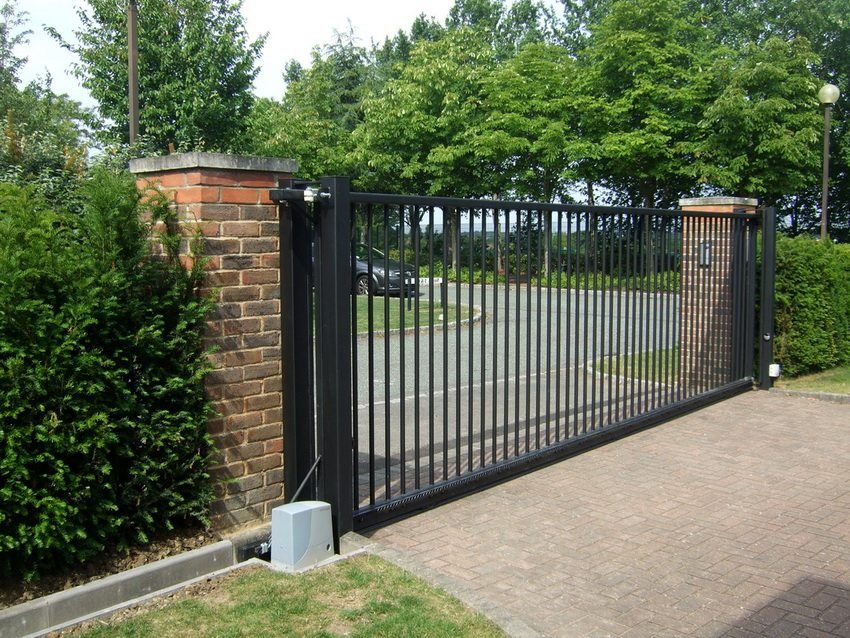
To install automatic sliding gates, you will need specialized electrical equipment. The choice of automation is a rather complicated matter, since it depends on the weight of the structure, environmental conditions and many other factors. Special attention should be paid to such characteristics:
- Material gear in the gearbox – metal are the most reliable and best tolerate adverse environmental conditions. In addition, they are characterized by durability.
- Engine power reserve – in case of severe frost, the load on the engine is greater than in normal conditions, therefore, the power reserve in this case must be substantial.
- Type of switch – a metal limit switch can act up in the cold season, so for use in harsh climates it is better to choose a magnetic one.
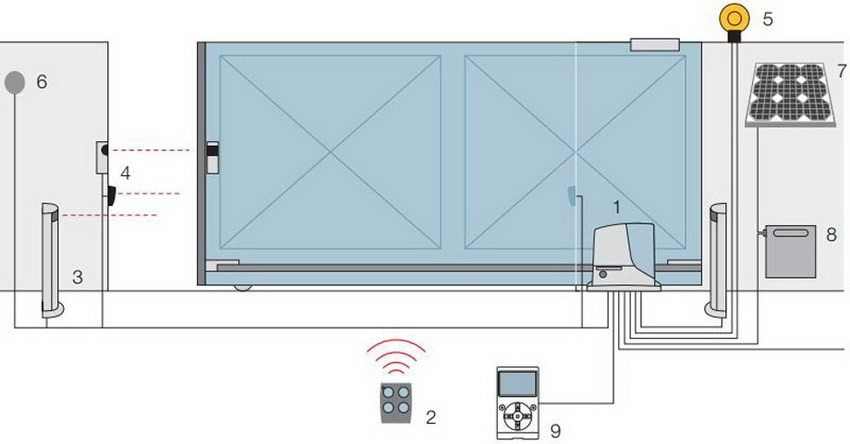
Another important parameter when choosing automation is the weight of the leaf. If it does not exceed 500 kg, then we can safely choose a drive for lightweight gates, and if it reaches 1 ton, then we need automation for weighted structures. A separate type of equipment is used for industrial doors.
- Most models do not provide wickets, i.e. one can enter through such gates only by opening them completely.
- Retractable gates take space from the fence.
- It is quite difficult to choose the right type of grating, for this you need to carry out a large number of calculations.
You can talk about other advantages and disadvantages of sliding gates for a long time, but one thing you need to know for sure is that this type of fence is quite reliable and takes up little space, which can be a decisive factor when choosing a beautiful and functional design for a country site.
