Among roofs for a private house, hip roofs have a good ability to self-clean and resist strong wind loads. In addition to excellent technical characteristics, the appearance of such structures is impeccable. However, the roof system of the hip roof has a rather complex structure and requires the correct calculation of all components. The presence of a competent project and painstaking installation will be the key to a beautiful and sturdy construction.
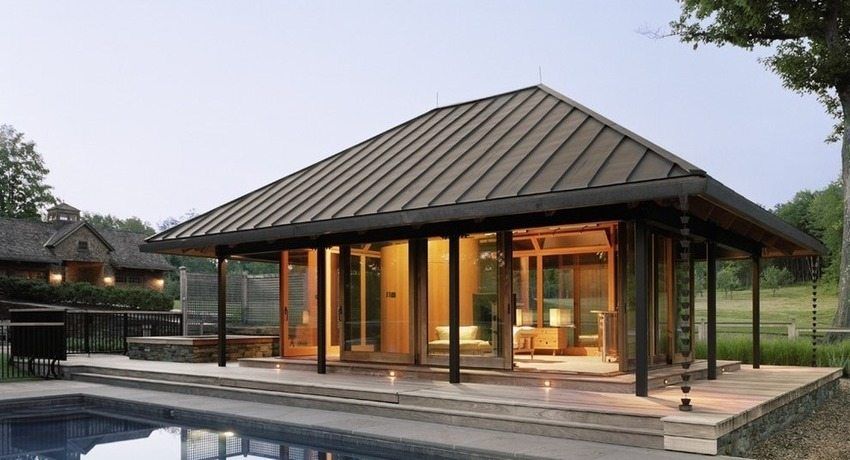
Hip roofs: photos of interesting designs
Hip roofs are a type of roofs consisting of four slopes and, due to their design features, have a greater resistance to strong gusts of wind. This is explained by the fact that instead of pediments in houses with a hip roof, hips are used (inclined triangular slopes), thanks to which the shape becomes more streamlined and the roof itself is durable.
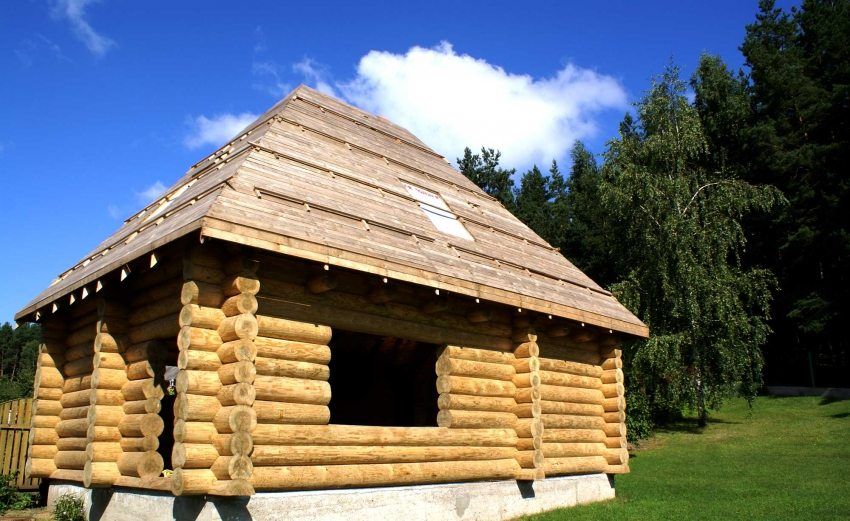
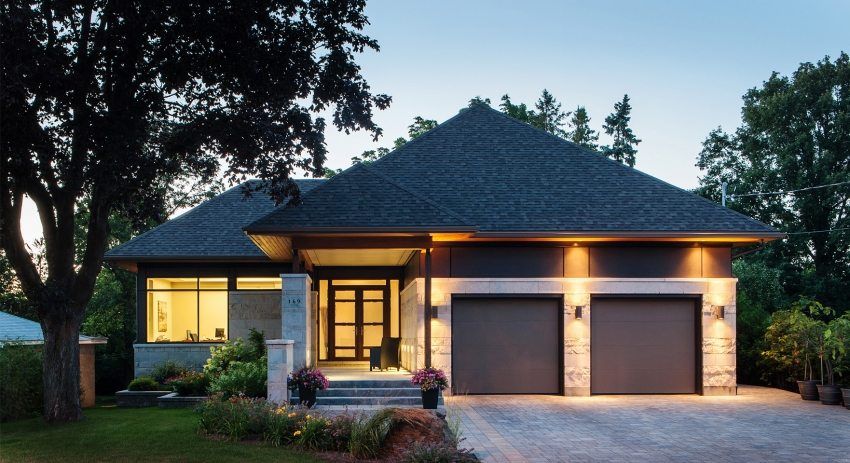
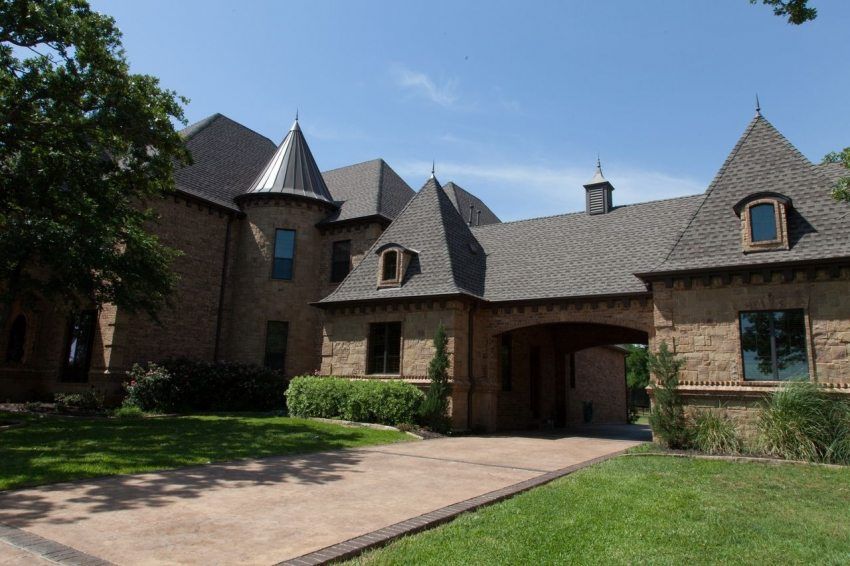
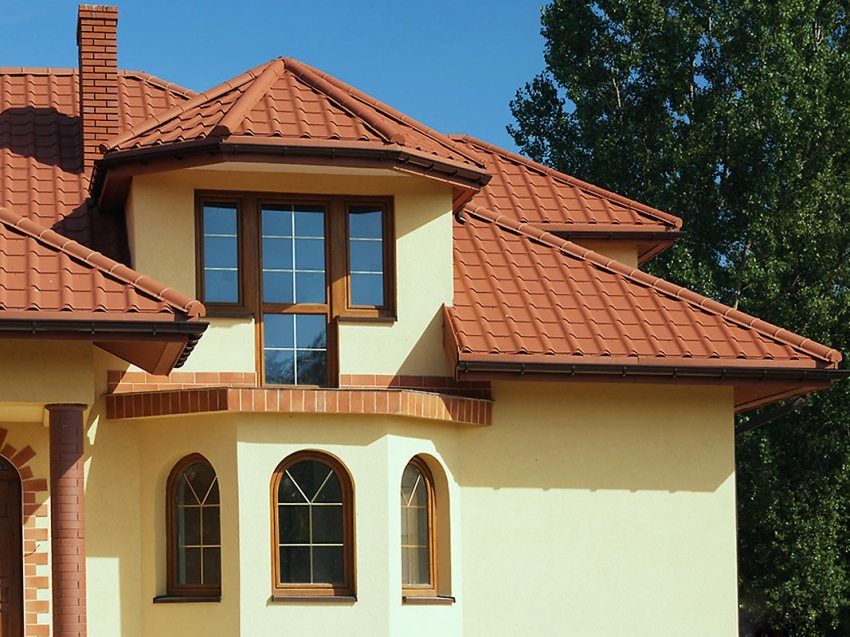
The lack of gables makes the height of a house with a gambrel roof visually smaller, but in general, house-building with such a roof looks organic. Photos of one-story houses with a hipped roof indicate that often the space directly under the roof is used for arranging a cozy attic room. To illuminate the attic in the roof have full window designs.
Photos of houses with a gambrel roof illustrate the neat exterior outlines of the roof, in which dormer windows are often installed. This makes the roof colorful and interesting in design terms. Four-pitched roofs are usually used for large houses, the base of which forms a rectangle. If the perimeter of the house is square, then use another type of hip roof – hip roof.
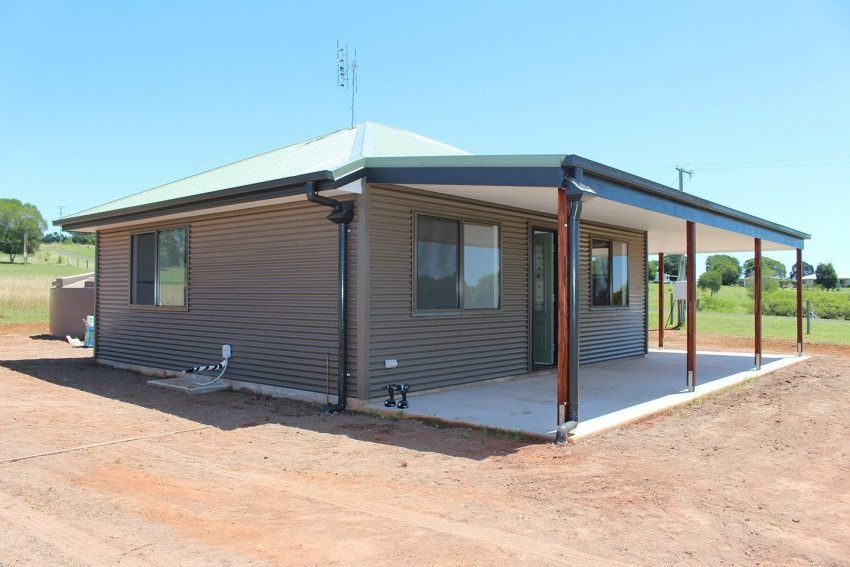
The main feature of the hip roof is that all its slopes have the same shape of an isosceles triangle and an identical angle of inclination. All faces of such a construction at the same upper point converge. Hipped roofs are also relevant in homes that have a regular polygon shape. How many sides in a polygon, so many symmetric ramps will be at the roof. From the point of view of architecture, such constructions are no less attractive.
Another subspecies of the hip roof is a half-hinged roof. This combination in one design of the gable and hip model. To give the roof a streamlined shape, the gable is covered with a small triangular slope (half-goose), the length of which is shortened along a slope. This option contributes to the fact that the ridge roof element becomes inaccessible to the action of wind flows. When using the space under the roof as an attic, it is possible to equip high-grade windows in the gable part.
Rafter system of a half-folded roof: design and installation features. Calculations and stages of construction. The choice of insulation, insulation layer and roofing material. Algorithm for mounting and finishing a half-hinged roof.
Exceptionally look hip roof with bay window. Bay windows add romance and sophistication to all house building. Roofs can be found with bay windows attached to the main structure or separately erected above the ledge of the wall. The main disadvantage of such roofing is the complexity of the design and rather expensive installation.
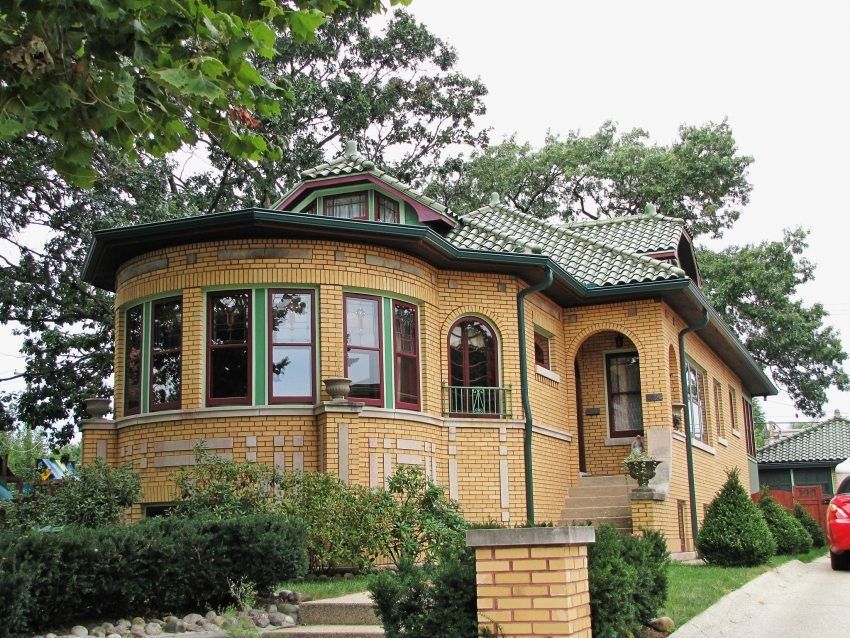
To cover the hip structure, you can use almost all modern roofing materials: slate, decking, metal, ceramic and bitumen tiles and other materials. The roof covering is selected taking into account the slope of the roof, the climate of the region, the characteristics of the material. In addition, not the last role is played by durability, aesthetics and the cost of the coating itself.
Note! Use as a cover tent construction sheet roofing material will entail a fair amount of waste.
Getting acquainted with the design of the hip roof, you can find that it is rather difficult to reconcile all the slopes with the same incline. Need accurate calculations, competent project and theoretical recommendations of professionals. But, despite the complexity of the construction of the frame, hip roofs are undoubtedly popular among private developers.
In addition to the original design, hip roofs have a number of advantages, which advantageously distinguish the structure among other models:
- The absence of pediments contributes to the invulnerability of the structure to strong wind loads. The smaller the slope of the roof slopes, the less impact wind pressure has on the roof system;
- the streamlined shape of all four slopes contributes to the stability of the structure to any kind of precipitation;
- as for the efficiency of energy saving, such a construction is in many ways superior to dual-ply roofs;
- it is much easier to insulate the hip roof, as the heat-insulating cake is located under the slopes. In models of roofs with gables – special insulation of the vertical facade, more subject to wind power, is required;
- the system of mowing, central and rafter trusses provides a robust design that is resistant to deformation under external loads;
- Depending on the slope, there is the possibility of rational use of space under the gambrel roof for the attic and arrangement in the roof of the windows.
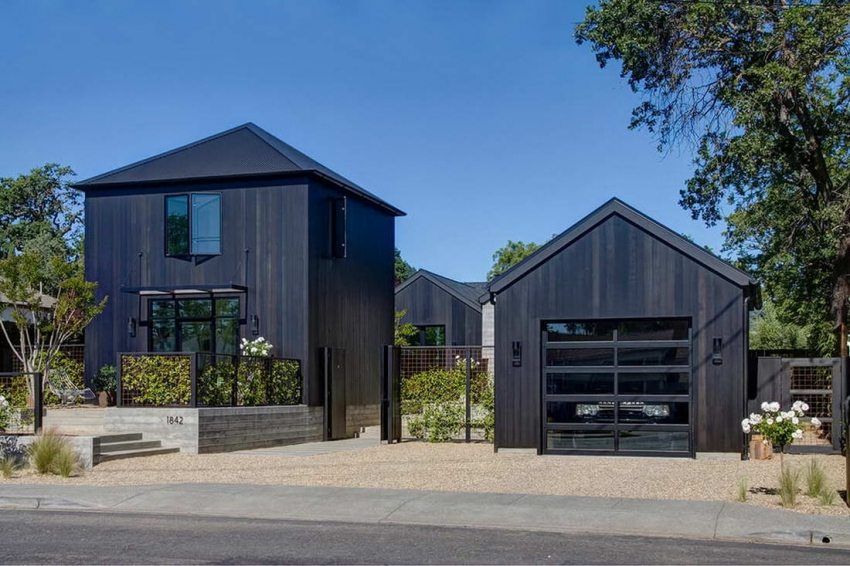
The main drawbacks of the four-hinged models are the complexity of the device of the truss system of the hip roof and the impossibility of arranging the attic in the models with a slight slope. However, with proper study of the drawings of hipped roofs and well-thought-out construction measures, the construction of such structures becomes a real task.
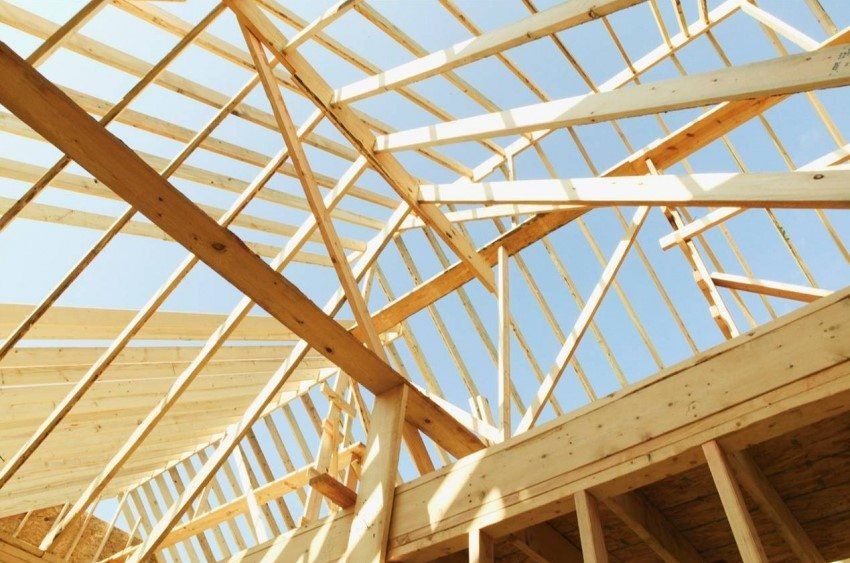
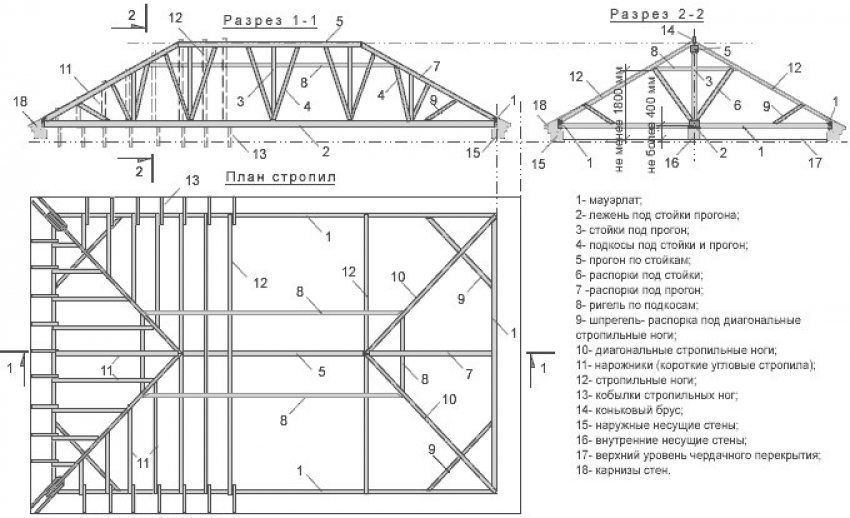
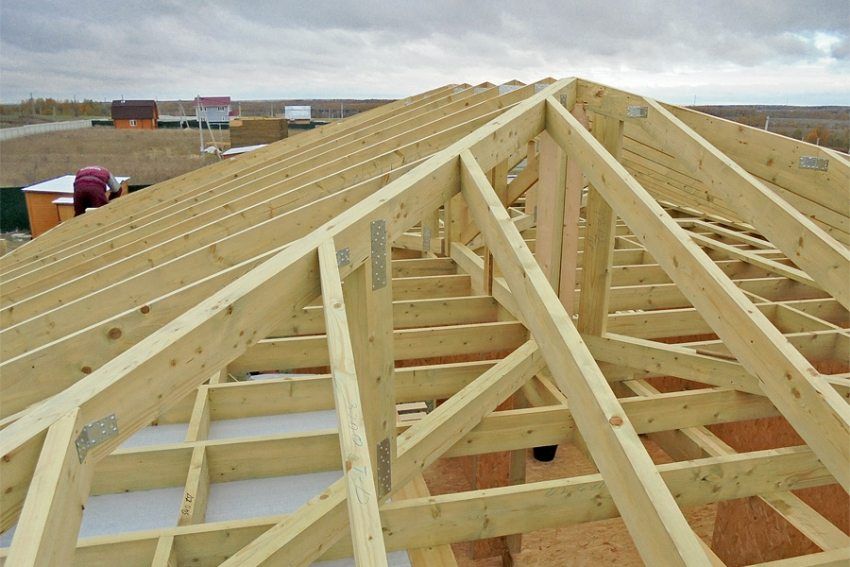
The skeleton of the hip roof is a ridge bar and a system of various rafters. Taking into account the fact that the slopes and hips have a different bias, there are several types of rafter legs. The main components of the design include:
- Corner rafters (nososnye) – the main supporting structural elements located at the corners of the frame. The slanting rafters have a smaller bias relative to other intermediate rafters;
- central rafters – they are attached to the ends of the ridge beam: on each side there are three elements. They are called central intermediate rafters;
- intermediate rafters – are located between the central rafters, originate from the strapping and end on the ridge;

- short rafters (cutter) – elements are attached at one end to the rafter, the other – to the strapping. Ladder rafters differ in length, but have the same slope;
- ridge girder – horizontally located crossbar, which serves as the upper support for slit and central rafters;
- Mauerlat – timber, mounted on top of the outer walls. It serves to evenly distribute the concentrated load of rafter legs. Mauerlat is a kind of base truss system and connects the frame of the roof with the walls of the house. Since the roof area is large, such a binding allows the roof not to “fly away” with strong gusts of wind;
Note! Selecting the parameters of the power plate, it is necessary to take into account the ability of the support beam to ensure the stability and reliability of the entire truss structure.
- strut – inclined timber used as a support for the rafters of a large span, perceiving horizontal loads. Using struts, it is possible to overlap significantly larger span and save the cross section of the main bearing beams. In the construction of hip roofs, the angle of inclination of the struts is 45 or 60 degrees;
- Babaka – vertical support, which relies rafter legs;
- Tightening is a wooden bar, which serves as an additional support for rafter legs and does not allow them to disperse. For tightening, a bar of smaller section is usually used than for rafters;
- Sprengel – horizontal elements, placed diagonally in the corners of the walls. Sprengel serves as a support under the rack for slit rafters. This element is used in the case when there is no technical possibility to install the rack on the floor;
- crate – a layer of small section boards, which are laid perpendicularly over rafters. Performs the role of the foundation under the roofing. Crate boards are laid with a small step (approximately in one board). In the locations of valleys or eaves, the crate is made continuous;
- contrabreshetka – elements that are installed on top and parallel to the rafters before the batten. Serve to create a ventilation gap between the crate, waterproofing and roofing material;
- a filly is a small section of the board with the help of which they extend the rafter foot to create a curtain-beam overhang. It is designed to divert rain and melt water from the walls of the house, as well as protect the basement and slopes from oblique rain.
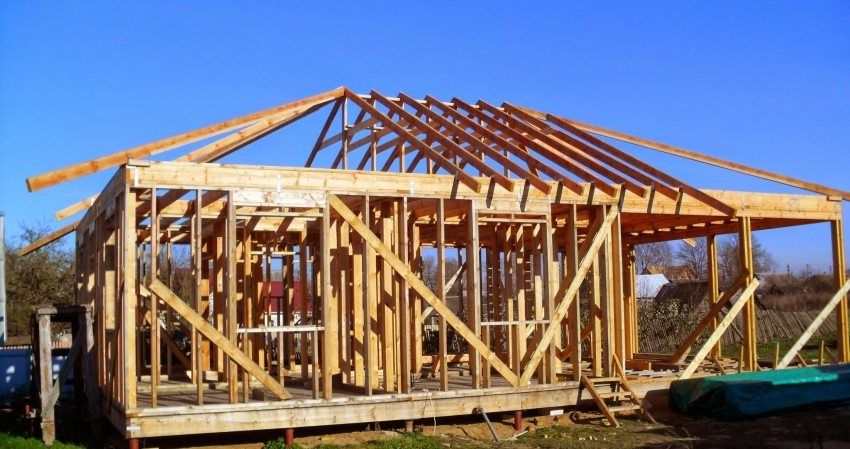
In the photo of the truss system of the hip roof you can see that the ridge girder is located strictly in the center and parallel to the bearing walls of the house. In addition, the start and end of the girder should be at the same distance from the end walls. Such an arrangement will ensure uniform distribution of the load, and, consequently, stability of the structure.
Hip hipped roofs are superior in complexity to the construction of conventional gable models. This is due to the complexity of the exact joining of all four ramps under the desired slope. Such roofs have two large slopes in the shape of a trapezoid and two end slopes in the shape of a triangle. In the formation of the truss system and there are major difficulties in the device hip roof.
The project of the house with a gambrel roof takes into account that the slope of the slopes should be in the range of 10 to 60 degrees. The choice of the angle of inclination is influenced by the amount of precipitation, the roofing material, and also whether the under-roof space will be used for the attic. In regions with high rainfall, the slope should be at least 45 degrees.
The hip roof should be provided with a cross-sectional shape, dimensions and exact location of all structural elements of the frame. In addition, the length of the ridge girder, the height of the roof, the angle of inclination of the slopes, the width of the spans, methods of strengthening the structure and the specificity of fixing elements are reflected in the drawings of the truss system of the hip roof.

Given that the stitched truss legs are long and are supporting for ladies, they need to be strengthened. To do this, use the sprengel, whose beam is cut into the power plate, and the sticking leg is supported. To enhance the truss system practice the use of wind beams. It is fixed from the inside of the central rafters diagonally mainly from the windy side of the house.
In the case when the rafters have a length of more than 4.5 m, diagonal struts are used to strengthen them, the use of which allows you to choose a smaller section for the rafters. The struts rest against tightening (floor beams), which do not allow the rafters to disperse. If the fasteners are attached closer to the ridge bolt, they can serve as the base for the ceiling plating of the attic floor.
Helpful advice! The closer the beams of fasteners are attached to the ridge girder, the more powerful the fixings of the truss system must be.
In the scheme of rafters of the hip roof, the expediency of the use of nylon or hanging rafters, as well as the use of additional reinforcing elements, is justified. If the calculations show that the bar parameters do not correspond to the required load, the use of glued or composable roof beams is possible. These modified elements are much more massive and can be long.
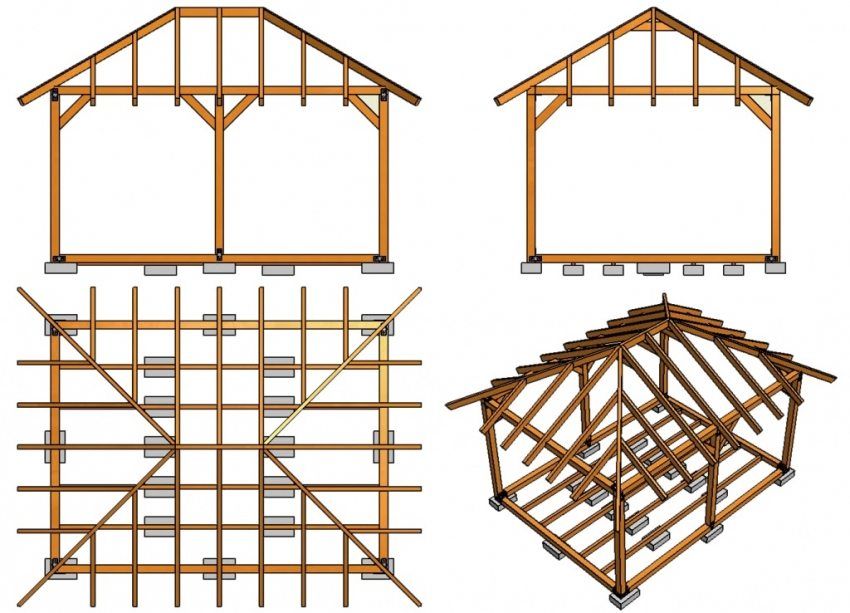
If the house-building does not have an intermediate bearing wall, then use hanging trailing legs, which rely only on two supports (on the two walls of the house). In this case, the rafters are subjected to compression and bending. In view of the fact that the rafter legs create expansion forces on the walls, a wooden tie is used which connects the rafters to each other. It is usually installed at the bottom of the base of the rafters.
When the building has an intermediate bearing wall or middle support columns, use the scheme of napsal rafters. In this embodiment, the rafters at one end based on the outer walls, and for the middle part of the legs are the pillars or the inner bearing wall. With this design, the truss elements work on bending, like a beam.
Compared to the roof, where hanging rafters are used, the design with the slanting rafters is lighter. The construction of such a roof consumes less materials, which reduces construction costs. It is possible to use a combined truss system in one design. This happens when one part of the house has an internal bearing wall, and the other is not. For the device of a roof over such structure use both options of rafters.
Scheme rafters hip roof with removal is used when it is necessary to increase the cornice. In this case, the truss legs will rest against the beams of the ceiling. When constructing a hip roof with rafters supported on floor beams, an element such as a power plate can be completely excluded from the construction scheme. Instead, it proposes the use of wooden leveling pads.
Quite popular in private construction is the construction of walls of houses with bay windows (ledges). This is a very interesting architectural solution, but the projects of such houses are characterized by the complexity of the design and construction of the structure. Bay window can be built not only during construction, but to attach to an existing building. The protrusion can be single-storey and multi-storey.
It is worth noting that the most difficult in the construction of houses of such architectural forms is the design and installation of a hip roof with a bay window. The main rule – the roof of the bay window should harmoniously support the main roof of the building, forming a common style. It is very difficult to build a bay roof, so not everyone decides to build such a house. The slightest inaccuracy in the calculations can lead to the fact that the design will be unreliable.
The shape of the roof for it depends on the shape of the projection (rounded, multifaceted, rectangular). It may be a hip, multi-tongue, duo-pitch design or a hemispherical roof. Sometimes a steeple-shaped roof is erected above the bay window.
Two variants of the roof over the bay window are practiced: an independent projection roof or combined with the roof of the main structure. For the truss system of the bay window, a material with a smaller cross section is used than for the rafter legs of the main roof structure. This is due to the fact that these elements will take a lesser load.
Technology laying roofing over the bay window is identical to the method of coating the main roof. It is recommended to use shingles, since for a small area with several slopes a material is needed, which would leave a minimum amount of waste. This requirement meets the tile bituminous or ceramic. To calculate the metal on the hip roof, you can use a special calculator.
Particular attention in the construction of roofs with a bay window should be paid to the valley. They are used in the construction of two types – the upper end plate and the bottom. One closes unaesthetic sections, and the other will drain. In addition, professionals do not advise to save on fasteners (screws, nails, pins, plates). They must be purchased in the right quantity and good quality.
Helpful advice! To improve the reliability of problem areas of the hip construction with a bay window, a sealant and a sealant should be used in these places.
You can learn about the features of the construction of the structure from the video installation of a hip roof with a bay window.
Before you start building a hip roof with your own hands, you must complete the drawings and make a correct calculation of the whole structure. It would be useful to seek help from a specialist who has experience in this field and will be able to optimally choose the angle of inclination and make the calculation. Given that the design of the roof may contain broken lines and irregularities, it will be difficult to accurately calculate all the constituent elements.
Before you make a hip roof with your own hands, even the simplest design, you will need to develop a hip roof project with drawings and sketches. This will help determine the shape of the roof and will provide an opportunity to correctly calculate the required amount of materials for construction. To perform the design, you can use the following recommendations:
- should measure the height, length and width of the house. According to the data obtained, schematically depict the facade and the end of the house at a convenient scale. Such sketches need to perform several copies;
- when determining the optimal height of the hip roof in relation to the house and the slope of the roof slopes, it is necessary to display several variants of the roof contour on one of the sketches. Next, you should choose the most successful one and, using a protractor, determine the angle of inclination of the slopes of the future structure;
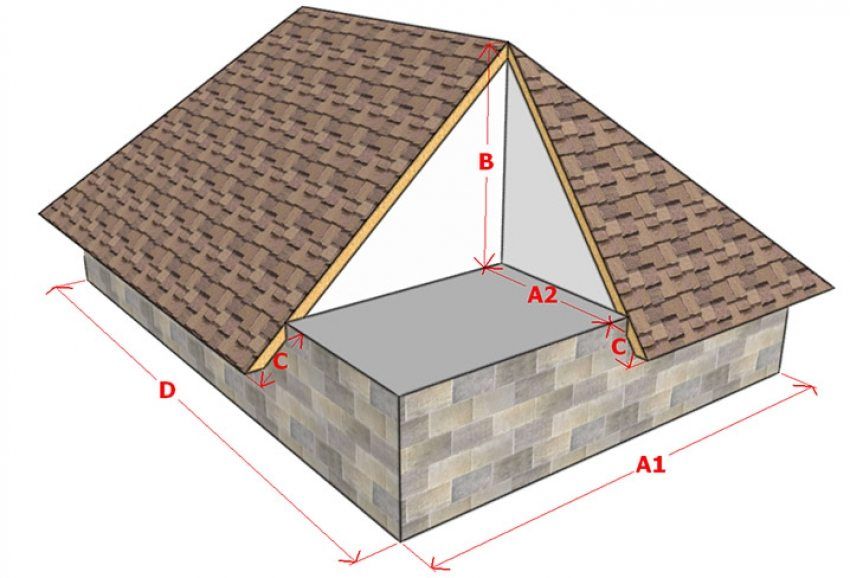
- The next step will be marking on the layout of the position of nasal rafters – mark the points in these places. We divide the length of the wall indicated in the diagram into equal segments – this will be the step between the beams. It can be from 40 cm to 2 m. But it is necessary to take into account that quite often installed rafter legs will entail an excessive consumption of material, and a large step between the rafters will cause the use of structural reinforcement elements;
- when determining the length of the ridge, it is necessary to take into account that the run must bind a pair of number of truss legs. In one of the sketches, it is necessary to mark equal segments from each edge of the wall;
- The resulting schemes are transferred to the general scheme, after which it is possible to calculate the amount of material needed. The length of the rafter legs is determined by the outside, based on the length of the eaves (about 50 cm).
Helpful advice! In order for the roof structure to be strong and durable, it is necessary to acquire well-dried lumber.
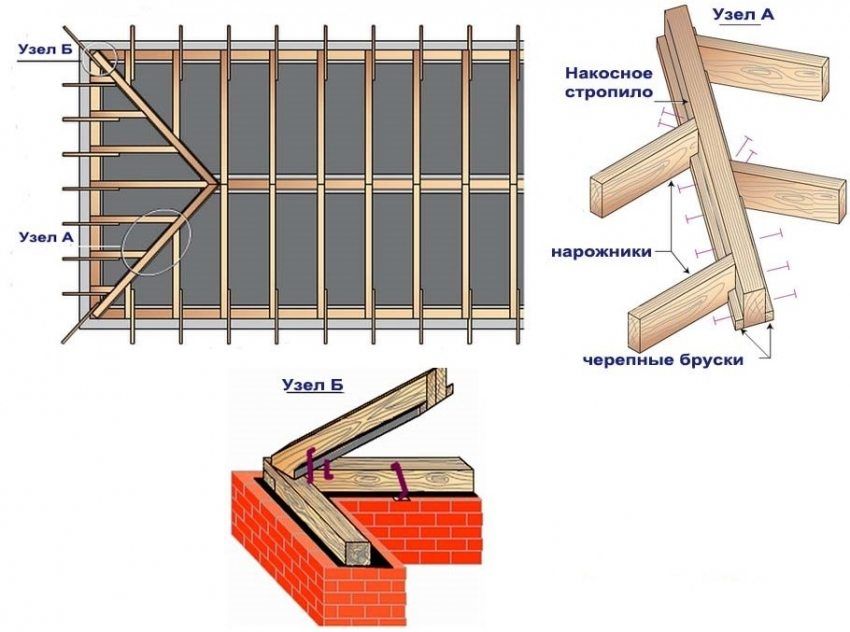
By the number of rafter legs, you can calculate the number of fasteners. In all the nodal fasteners will be used nails. Each rafter leg has two mounting angles. When procuring material, make a small margin in case of damage to the material. If the house is made of bricks or blocks, you need to purchase a bar for the device Mauerlat.
When determining the angle of inclination of the hip roof should take into account the climatic conditions in which construction is underway. If the climate is hot, dry and windy – the slope should be minimal to prevent overheating and to avoid additional load. In areas with heavy snowfall – the slope increases for unimpeded snowfall.
In addition, when choosing the angle of the hip roof, one should take into account the roofing material, each type of which has limitations on the slopes of the slopes:
- slate – coating is used when the slope of the roof from 13 to 60 degrees. If the angle of inclination is less than 13 degrees, then moisture will seep into the joints, and in winter snow will fall. This will significantly reduce the life of the roof;
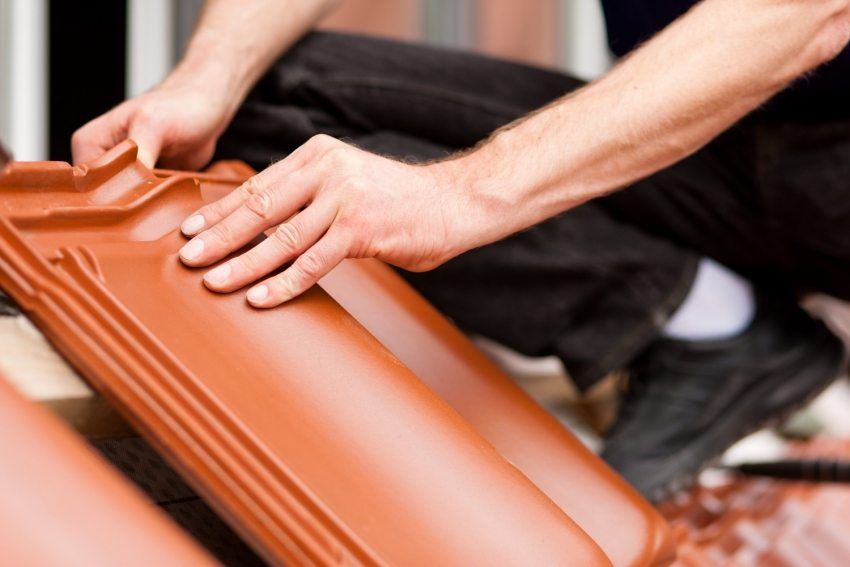
- ceramic tile – the optimal slope for this material: from 30 to 60 degrees. When laying tiles on the roof with a slope of less than 25 degrees, measures should be taken to improve ventilation and waterproofing;
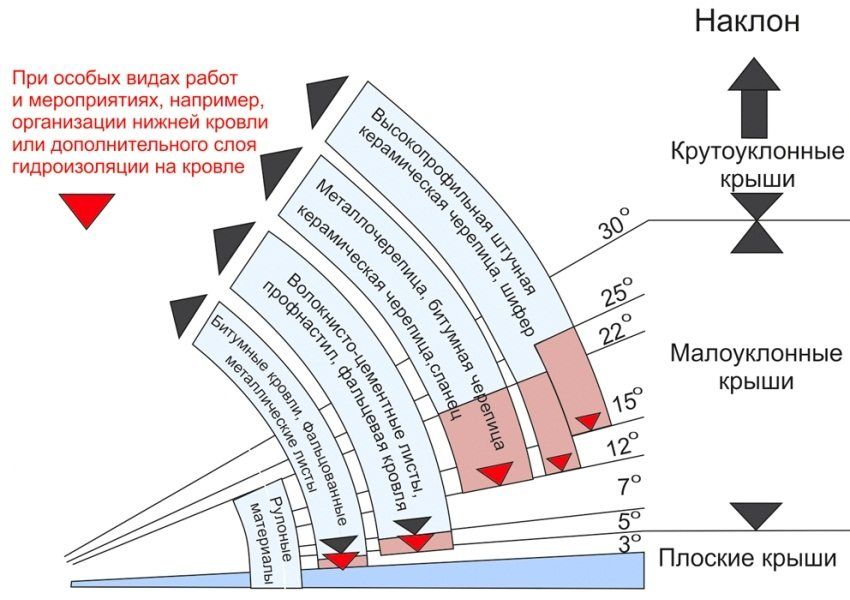
- metal tile – when laying this material the maximum angle of inclination is not normalized, the minimum – 15 degrees;
- shingles – coating used for roofs with a slope of more than 12 degrees. Maximum tilt angle is unlimited. The material perfectly repeats the shape of any surface;
- bitumen slate – sheets of this material are used with a slope of 5 degrees. There is no maximum value, however, the pitch of the batten will depend on the angle of inclination, and with a slope of 5 to 10 degrees, it is necessary to arrange a solid flooring;
- steel faltsevaya roof – fit with slopes of 20 degrees. There is no maximum tilt limit.
Increasing the angle of inclination contributes to an increase in the roof area, which will entail additional costs for the building material. Therefore, if it is fundamentally important to save materials, this should be taken into account when drawing up the drawings.
To determine the required amount of roofing material to cover the hip roof, it is necessary to calculate the surface area to be covered.

The calculation will require the following data:
- the roof windows and chimney pipes are taken into account, as their presence requires an increase in the consumption of roofing material;
- determines the length of the slope from the bottom of the ridge to the edge of the eaves overhang;
- the walls of the firewall, parapets, overhangs and other elements are calculated;
- the calculation does not take into account the junction of the paintings, standing seams, protruding elements of the bars.
Helpful advice! If rolled material or metal tile will be used for the coating, it is necessary to reduce the length of the roof slopes by 70 cm when determining the surface area.
To obtain accurate data on the roof area, you can seek help from specialists or use modern programs that will produce the most accurate calculation. But if, nevertheless, you decided to do it yourself, it is necessary to conditionally divide the entire surface into separate elements, the area of which is easy to calculate mathematically, and then the resulting values summed.
The more accurately the area is determined, the lower the probability of acquiring surplus material and wasting financial resources. The amount of materials required for construction should be recorded at the design stage of a one-story house with a gambrel roof. The cost of these materials includes roofing, so the cost of building the house as a whole depends on the correct calculation of the surface area of the roof.
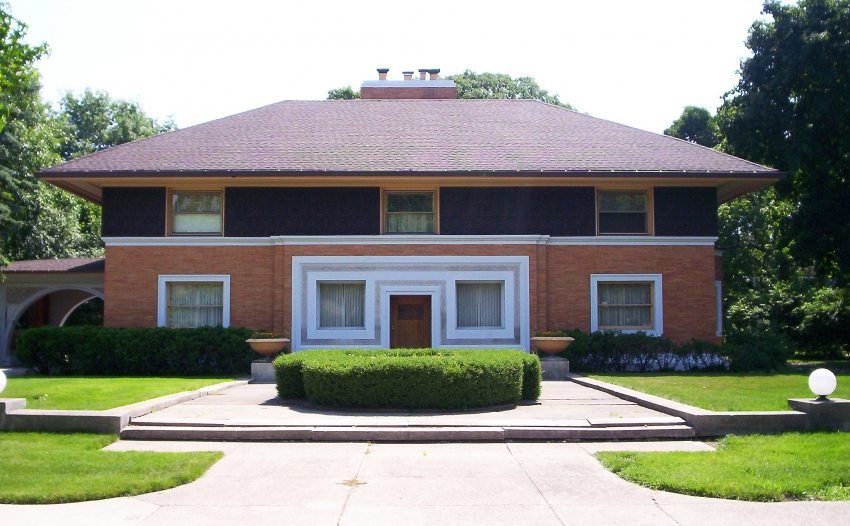
To calculate the area it is necessary to use the hip roof plan. You should also take into account the technical characteristics of the roofing (thickness, length) and methods of its installation. The thickness of the material affects the weight of the coating, and knowing the length and width of the material you can arrange it with the least amount of waste and connecting lines.
For clarity, you can analyze the use as a roofing material of ceramic or flexible tiles. Ceramic tile – the material is heavy and exceeds the weight of the flexible 5 times. Under laying shingles do not require a system of rafters and frequent obreshetka, but under it you need to lay solid plywood or other material. Therefore, in order to determine the cost of the entire construction and select the most advantageous material, it is necessary to perform the calculation of the hip roof.
Undoubtedly, the total cost of construction will be affected by the area of the hip roof, but at the same time the complexity of the construction of the structure itself should be taken into account, especially when it comes to arranging the attic room. The complexity of the calculation will be affected by such elements as dormer windows, ventilation holes, chimneys, etc.
For example, you can calculate the area of the hipped roof hipped roof. With the roof drawing, calculations are much more convenient and the required values will be more accurate. The diagrams show that the base for the roof is a rectangle, two slopes are an isosceles triangle, the other two are trapeziums.
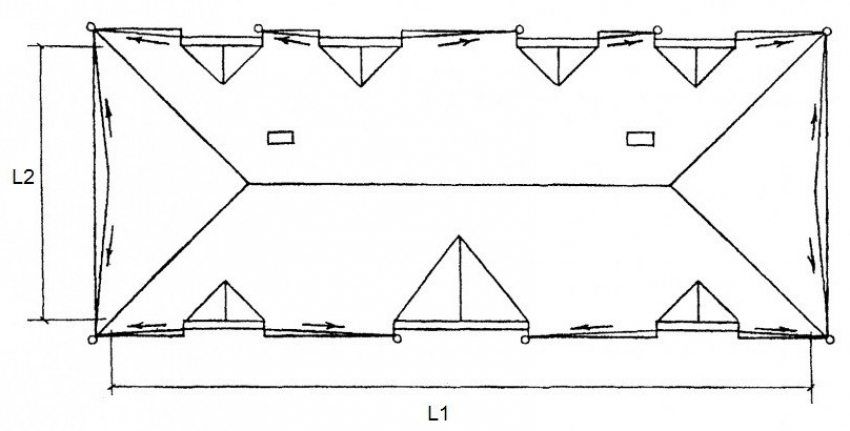
In this case, the tangent of the angle of the triangular face is equal to the ratio h (height of the roof) to? b (the length of the base of the triangle). So, the height of the roof is defined by the expression:
h = (b tan?) / 2.
The length of the side truss foot (e) can be determined using the angle of inclination:
e = b / 2 cos?
Using the Pythagorean Theorem, you can determine the length of the cropping truss legs (d):
The total area of the entire roof is calculated by summing the areas of all the constituent elements of the surface of the hip roof, namely four triangles and two rectangles:
S = 4 (eb / 2) +2 (a-b) e = 2e (b + a-b) = 2ea.
If you want to calculate the area of the hip roof per square house, then its value will be equal to the sum of the areas of the four triangular ramps.
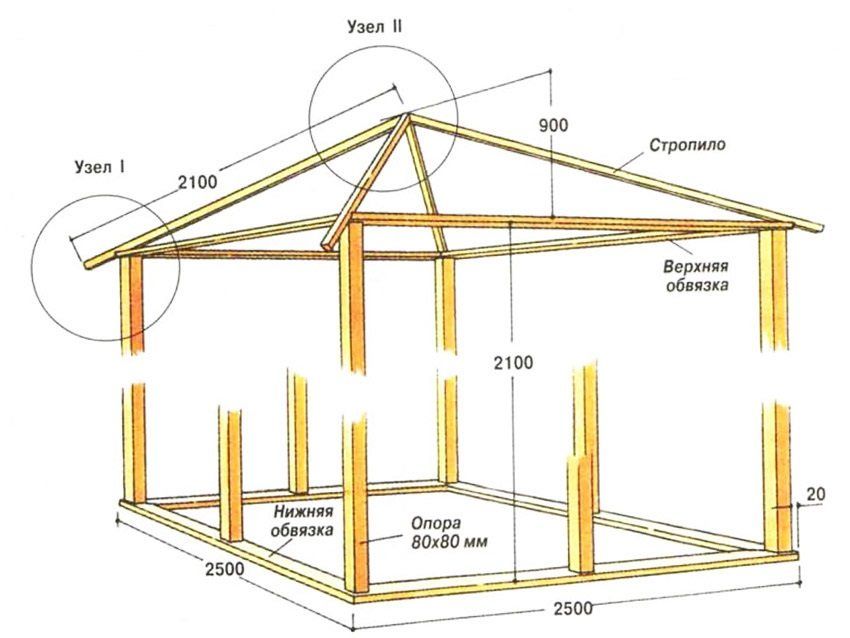
Due to the fact that not everyone can independently calculate all the parameters of the roof, the websites of companies specializing in the construction of roofs and sales of roofing materials suggest using an online calculator. With it, you can find out the exact amount of lumber, insulation and roofing materials, as well as calculate the length and section of the rafters for the design of the selected type.
Using the online calculator with drawings and diagrams to calculate the hip roof, it is possible to determine how optimal the slopes are with respect to one or another roof covering, whether the bar section can withstand the existing wind and snow loads on the roof system in your area.
Before calculating the hip roof using the program, it is necessary to fill in the calculator’s proposed fields: the length and width of the base, the slope of the roof, the length of the side and end overhangs, the width, thickness and pitch of the batten board, specify the type of wood and pitch for rafter legs. In addition, to calculate the load data is entered on the region and type of terrain.
Helpful advice! While working in the program, please note that there is a “?” Icon opposite each filled field. By clicking on it, you can find explanations for the specific input parameter.
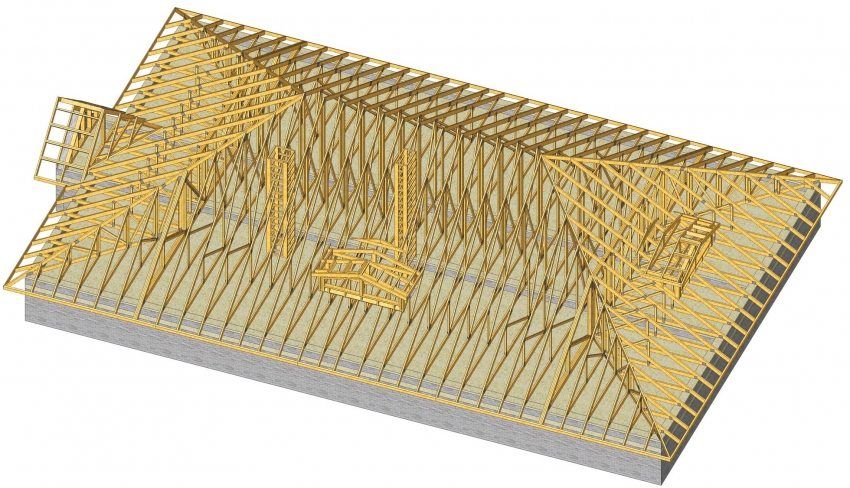
After processing the entered data with the online calculator, you will receive information about the compliance of the gradient you specified with the norms of the roofing surface used. If a discrepancy is found, the program will offer replacement options. In addition, you will receive data on the height of the lift, the length of the ridge of the hip roof, the weight of the roof covering, the amount of roll material taking into account the length and width of the roll, as well as the required overlap during installation.
The calculator’s conclusions also include the surface area of the roof (this will include the sum of the areas of all ramps, including overhangs of the required length), the amount of roofing and under-roofing material that will be required for the construction of the roof. The calculated maximum load on the rafters system takes into account the roof structure, the weight of the roofing pie and the entered data on snow and wind loads.
In addition, the program will calculate the roof system of the gambular roof: it will provide information on the number and size of lateral and diagonal rafters, and will also suggest the recommended minimum size for the roof system, the choice of which will provide the structure with adequate strength.
With the help of the calculator data on the optimal number of rows and battens, it is possible to avoid possible waste of material, as well as the time spent on excessive trimming of sawn timber. In addition, you will receive information about the number of boards in cubic meters and kilograms.
Using the program for calculating the hip roof you will not only save time and finances, but also get practical recommendations based on the regulations of the Load and Impact Construction Norms and Regulations and Technical Standard 45-5.05-146-2009 (Wooden Structures. Building Design Standards).
Assembling the truss system of the hip roof is not an easy task, but with strict adherence to the project and practical advice from professionals, you can cope with the construction yourself. The key to high-quality installation is the most correct calculation and exact scheme, following which you can make the correct cuts of the rafter legs and install all the structural elements. For example, you can familiarize yourself with the video of the stages of editing, finding it on the Internet.
Before you make a hip roof yourself, you should familiarize yourself with useful recommendations, adhering to which you will not have to doubt the reliability of the design:
- intermediate truss legs have a steeper slope than side mowers. In this regard, a board with parameters of at least 5×15 cm is used for them;
- fixing of short rafters is made not to ridge run, but to nakosny elements. The angles of inclination of the short and intermediate truss legs are the same;
- sawn timber used for ridge and truss feet must have identical cross-section. It is precisely with the observance of this design rule that proper strength will be ensured. Otherwise, the probability of deformation is high;
- intermediate rafters are attached to the edge of the ridge beam and to the top of the harness;
- hip roof height can be any, but if the slope is very small, you should use additional racks, supports;
- To prolong the service life of the hip construction, it is necessary to use sawn softwood, previously dried and free from defects in the form of knots and cracks. In addition, before starting work, all wooden elements are treated with antiseptic compounds.
The construction of the hip roof begins with the marking of the object.
Step 1. From the side of the housing construction it is necessary to map the axis along the upper piping of the walls.
Step 2. Next, you need to determine half the thickness of the ridge girder and outline the location of the first element of the roof truss system.
Helpful advice! To avoid inaccuracy when marking the object, it is recommended to use a special measuring rod, on which all the necessary dimensions will be marked. It can be cut, for example, from a strip of plywood. Recommended width of slats 5 cm.
Step 3. Attach the rail with one end to the intended line and place the other along the side wall. So you can pinpoint the location of the intermediate truss foot.
Step 4. To determine the length of the rafter overhang, it is necessary to place the beam at one end on the outer corner, and the other on the roof overhang.
Step 5. To determine the location of the central truss foot, it is necessary to move the marking rail to the edge of the side wall and fix the location of the central element of the truss system.
This procedure should be applied to all four corners of the building. Thus, installation sites for intermediate rafters and the ends of the ridge girder will be outlined.
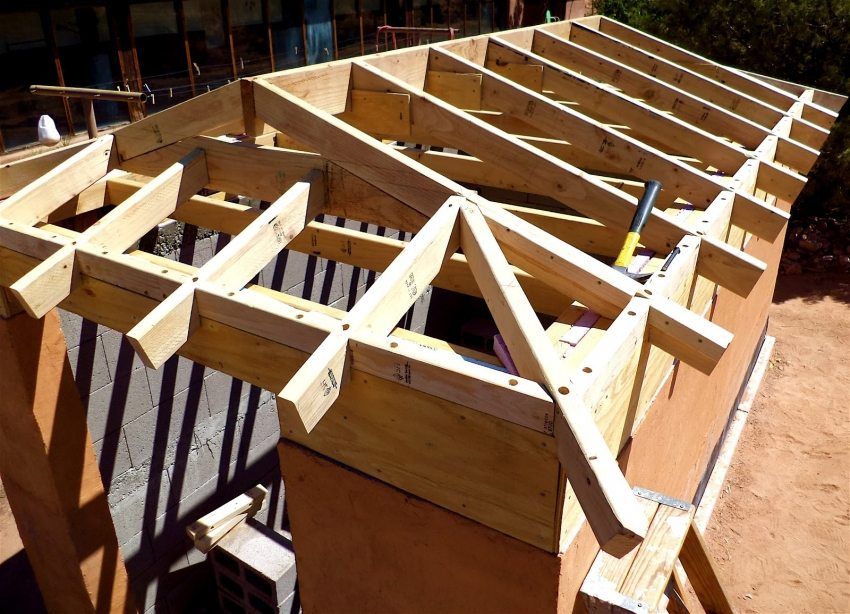
After making the markings, it is necessary to calculate the rafter system.
Step 1. With the help of the rail, it is necessary to determine the horizontal projection of the intermediate truss foot. From the table of standards, find the roof slope that matches your situation and multiply the values.
Step 2. Measure the length of the truss foot, with the measurement should be done along the bottom line from the sampling point on the ridge run to the sampling at the base of the foot.
Step 3. To determine the length of the overhang, it is necessary to multiply the value of the horizontal projection of the rafter by the correction factor from the table of proportions.
Table of proportions and coefficients of amendments:
| Roof slope | Coefficient for angular rafter | Coefficient for intermediate rafter |
| 3:12 | 1,016 | 1,031 |
| 4:12 | 1,027 | 1.054 |
| 5:12 | 1,043 | 1.083 |
| 6:12 | 1,061 | 1,118 |
| 7:12 | 1.082 | 1,158 |
| 8:12 | 1,106 | 1,202 |
| 9:12 | 1,131 | 1,250 |
| 10:12 | 1.161 | 1.302 |
| 11:12 | 1,192 | 1,357 |
| 12:12 | 1.225 | 1,414 |
Helpful advice! In the calculations, you can use the Pythagorean theorem, in which with? = huh + b ?, where a and b are the vertical and horizontal projections respectively.
Step 4. Next, you need to calculate the angular rafters. To attach the truss legs to the ridge beam, oblique cuts are made at the ends of these elements. In turn, the ridge girder also has a double bevel, thanks to which the corner rafters securely fasten to it.
The calculation of mowing rafters is performed in the following sequence:
- the length of the rafter leg is determined from one of the corners of the house building;
- the projection is calculated, the value of which is equal to the sum of the squares of the projection of the central rafters;
- the resulting number is multiplied by the correction factor from the table. This will be the length of the rafter.
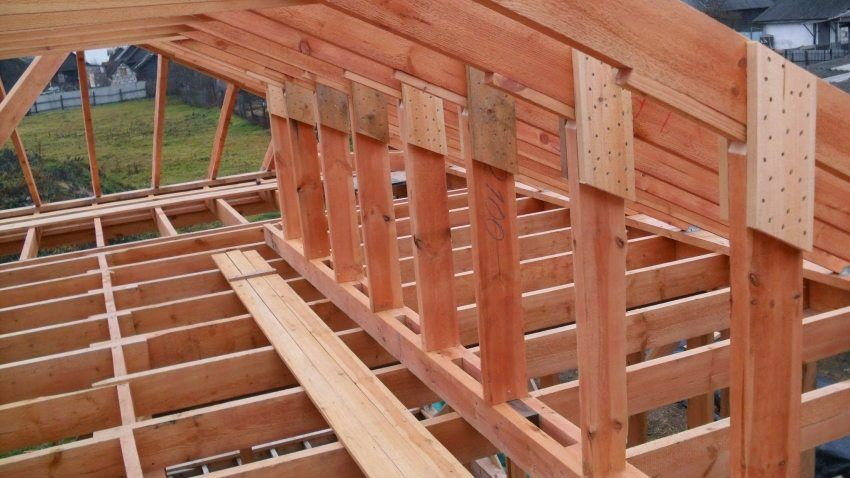
Next, install the rafter legs.
Step 1. First set the ridge beam, which is fixed on the uprights. The elements are fixed to the central beam by installing braces.
Step 2. When installing the truss legs, make sure that the length of all the elements is identical. Carefully fit your hips, bracelets and ridge bar.
Step 3. After the nakosnye legs are installed, you should proceed to the installation of ordinary truss legs, which are located with a step of about 60 cm. Fixing ordinary rafters is carried out to the power plate and ridge by cutting. To secure the mount, use screeds and crossbars.
Helpful advice! When installing ordinary rafters, avoid contact with the studs that fasten the power plate to the ends of the walls.
Step 4. Further to the nakosny rafter legs are attached short rafters (women workers). Through ramparts, the rafters will be connected to the power plate. The position of privates and rafter rafters should be perpendicular to the ridge bar.
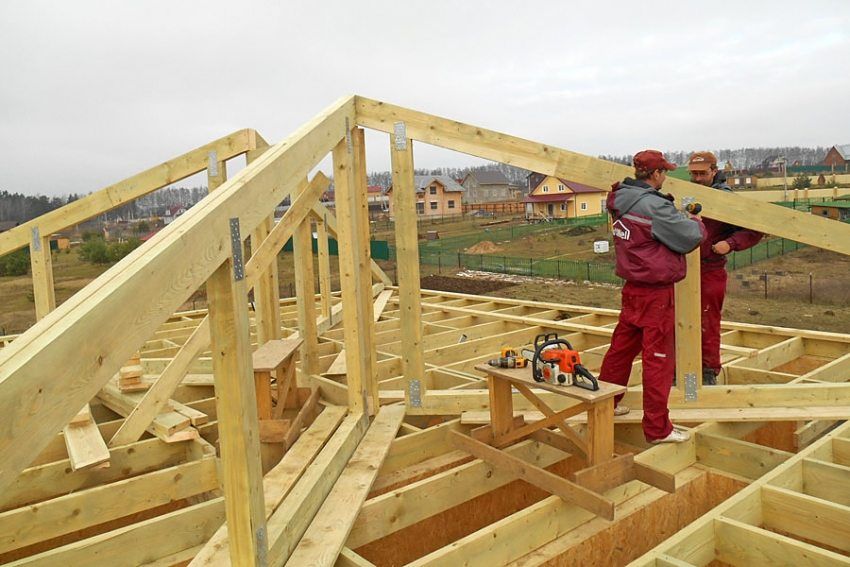
There are several options for strengthening the truss structure:
- at the corners of the construction, diagonally fastened with vertical stand sprengels, which will act as an additional support for stitched rafters. Fixed sprengel to Mauerlat;
- racks that will be supports for intermediate truss legs are placed on the tightening board;
- if the cropped truss foot is long, use glued or stacked beams for its manufacture.
An important step in the construction of the hip roof is the ventilation device. The roof is exposed to destructive impacts not only from the outside, but also from the inside, where moisture condensation may occur. This is due to the temperature difference between the outer and the inner surface of the roof. High-quality ventilation of the under-roof space will preserve the roof surface for many years.
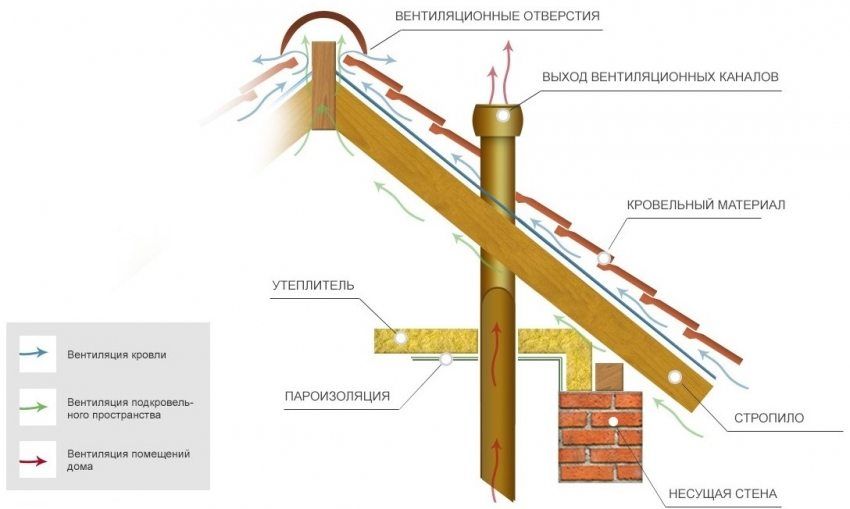
To ensure proper ventilation of the space under the roof, it is necessary to arrange an air inlet in the wind protection film. It should be located at a small distance from the ridge run. When used for winding a tree, it is laid with a gap of up to 3 mm. In the case of the use of plastic material – practice perforation.
For those cases when the wind protection of the roof is mounted without a gap, you can cut into it the usual ventilation grilles with a diameter of 50 cm. They should be placed along the entire length of the windscreen at a distance of about 80 cm from each other. After performing these works, you can proceed to the arrangement of insulation, waterproofing and laying roofing material.
The device hip construction – a technically complex and painstaking process. Doing work is worth it if you have enough time, experience and knowledge in this area. Any inaccuracy can lead to unreasonable consumption of materials and higher construction costs. If you doubt your abilities, it will be appropriate to seek the help of real professionals.

