When arranging fences around the house or suburban area, the question always arises: how to make the gate with your own hands. Drawings, photos and video materials presented in this article will help to understand the installation process of such structures, as well as to determine the choice of the method of opening. After a thorough miscalculation of all the subtleties and nuances, you can choose the optimal, suitable for a particular site design and prepare everything you need in advance.

Swing gates
The most simple and quite convenient option is a swing gate with built-in wicket. Such a scheme is most often used in the arrangement of fences for a private house due to the simplicity of the design and the possibility of installation with their own hands.
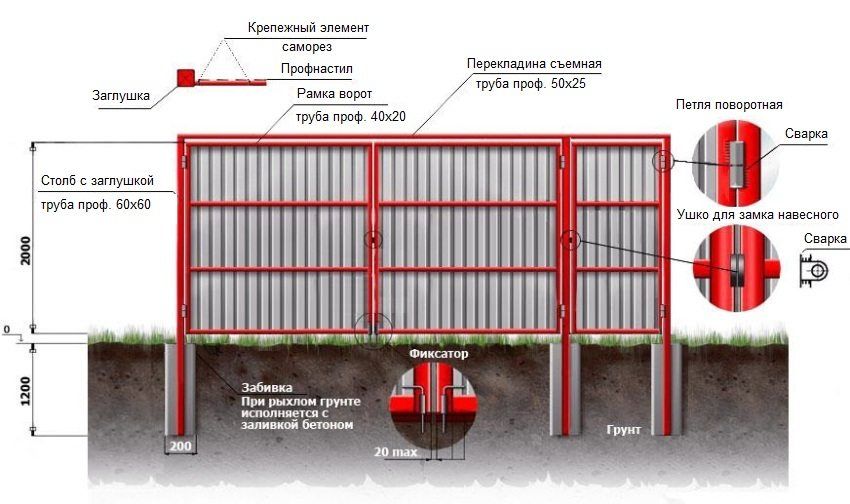
According to this scheme, the sash and wicket are mounted on ordinary hinges welded to support posts. Their mounting can be done in two ways: from the inside and outside of the supports. The side of opening the gates depends on the mounting option and the type of hinges. Most often, the valves are made in the form of metal frames made of a shaped tube or a metal angle. Sheathing can be carried out from different finishing materials, this may include:
- wood;
- thin metal sheets;
- decking.
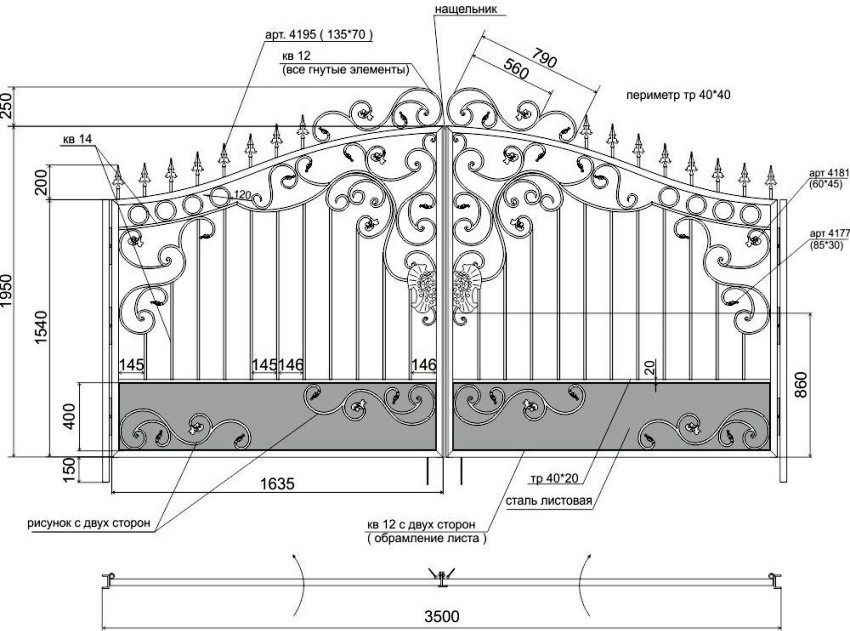
Forged doors also look good, but their creation is best entrusted to the master due to the complexity of this process. Without special skills it is impossible to assemble such gates with your own hands. Drawings, photos and videos to facilitate self-installation of other types of gates can be found below.
If the swing gates are planned to be made of a relatively lightweight material – corrugated, then metal pipes having a diameter of 80-100 mm are perfect as supporting pillars. For such a task is suitable and profiled square tube.
The doors themselves are made of pipes with a square cross-section, but smaller. Recommended dimensions 40x25x3000 mm. With the help of welding, the frame of the valves is made in the form of ordinary frames and then reinforced with crossbars or diagonals of the same material. Be sure to provide space on the doors for bolts, locks and stop opening-closing.
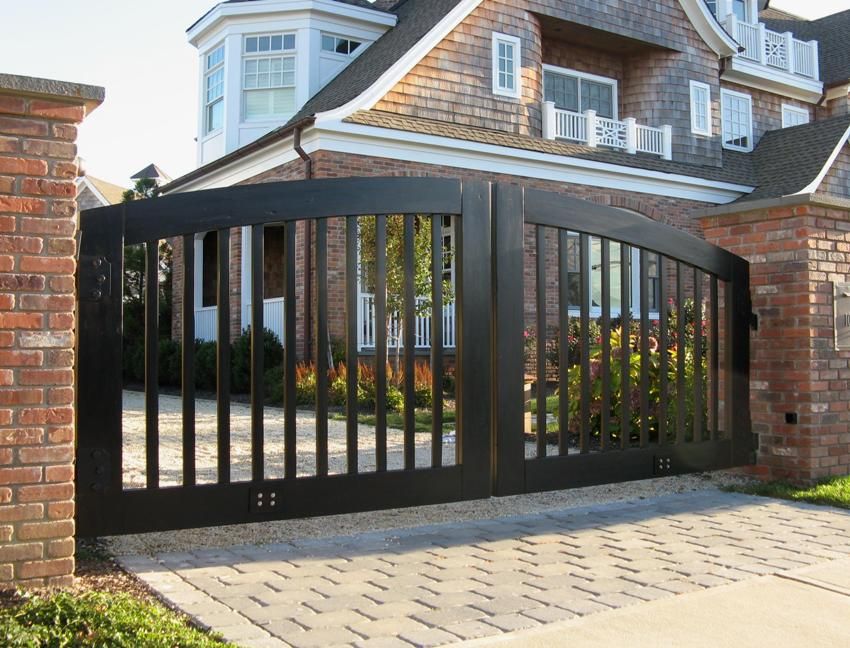
Begin the installation of such structures with the installation of support pillars. Below is described how to install the support for the gate with your own hands. Drawings, photos and videos will help to understand all the intricacies of work.
The device of gate for the private house. Photo of possible options. Types of gates for a private house. Photo installation options. Arrangement of swing and sliding entry groups. Gate automation.
Installation of supports can be done in two ways: by conventional blocking or concreting. In order to properly install a metal pipe into the ground, it is necessary to make a hole in advance and use a large sledge hammer to hammer in the support. The level of clogging is about 120-130 cm.
This method is considered the simplest, guarantees the speed of execution and high reliability of the future design. After installing the support you need to fix to the posts of the fence or, if required, to the outbuildings. Further, canopies are welded, on which the sashes assembled in advance are subsequently suspended.
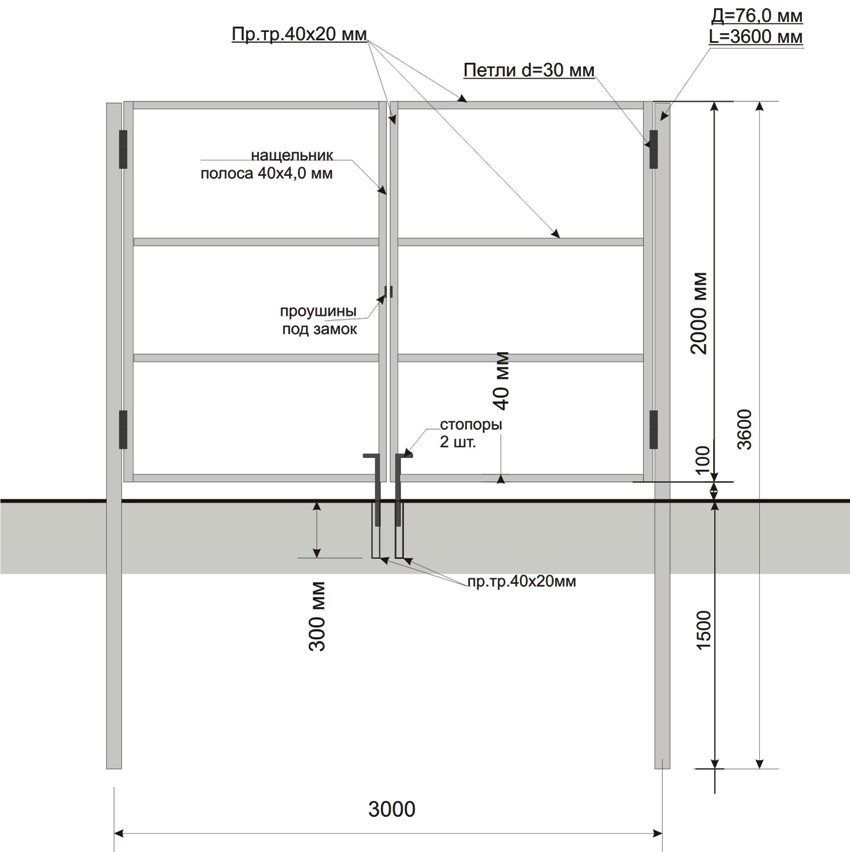
Concreting can be used as another method of installing supports. It can be made with reinforcement or without strapping with metal reinforcement. To do this, prepare holes with a diameter of about 25-30 cm, and a depth of 150-200 cm. These values may vary depending on the cross section of the support column. At the bottom of the prepared pits, the so-called pillow is poured – layers of sand and rubble, which are then compacted.
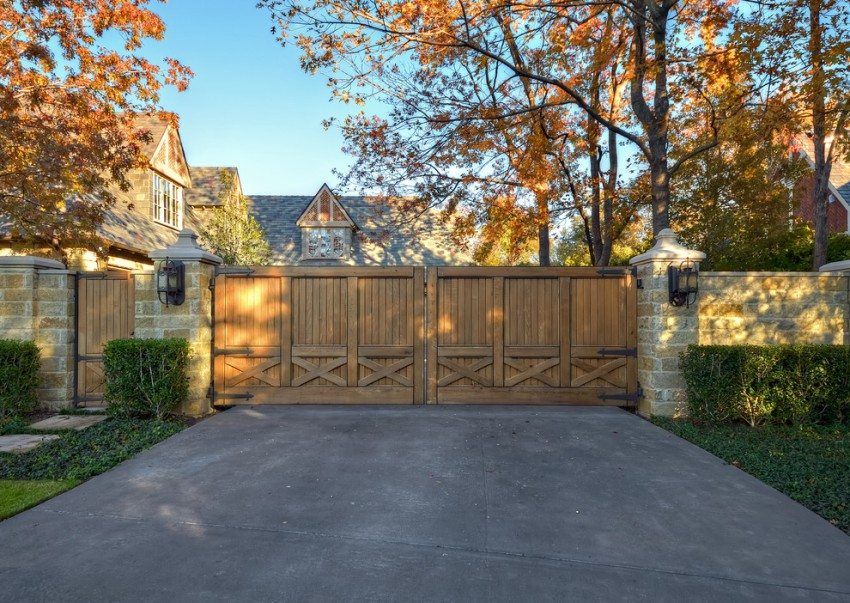
After that, the pillar is installed on the prepared cushion, if necessary, reinforcement is installed and the entire structure is poured with concrete. For this you can use cement brands M-200, 250. While the solution is fresh, the pillar is set on a level and fixed with additional props. Look good support columns, made of brick. In this case, the place to attach the loops are embedded directly in the masonry.
Of all the options for sliding gates, there are three most common. They are:
- console;
- recoiling;
- suspended.
The least popular of these varieties are the suspended gates. When installing them, the height of the passage is limited, as the metal profile is mounted on top, on which the sash is suspended.
In regions where winters are cold and snowy, it is not necessary to install a sliding gate option. For their full use, you will have to constantly clean them from ice and snow drifts, which is not always convenient. Otherwise, these designs are pretty good, they do not require a large area for full opening.
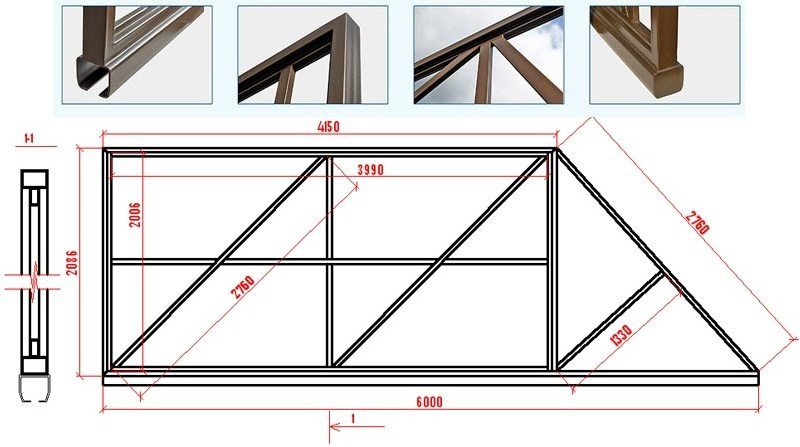
It is not difficult to make a sliding door with your own hands. Drawings, photos and video materials will help to understand the features of the installation of such structures. For sliding gates, space should be provided along the fence. The approximate dimensions of the sash are shown in the figure.
A special rail or profile is installed on the surface of the earth, on which the sash will move using special rollers. In the upper part are also installed roller elements and additional brackets, which will hold the canvas while moving.

Console gates are considered more complicated in the device than their counterparts. But it is a special device that guarantees reliable operation even in the frosty season. The main advantages of this type of gate are the absence of a height restriction and the possibility of installing only one support column. They have no contact with the ground rail, so their use in any weather does not cause any problems.
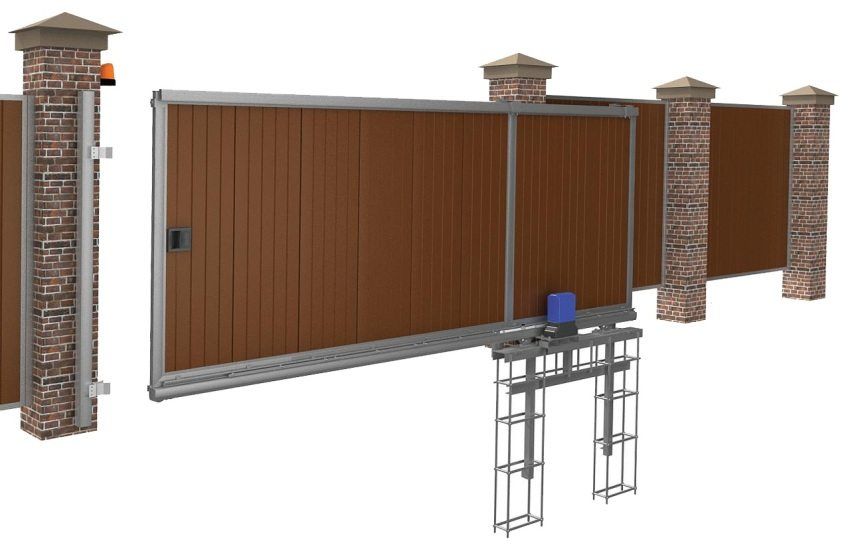
The door leaf is mounted on a previously prepared frame made of a metal pipe, profile or angle. A guide beam is welded to the frame from below, inside which roller carriages are installed. It is along them that the base moves in both directions, carrying out the opening and closing of the structure.
Helpful advice! After welding the frame, the obtained seams must be cleaned with a grinder, and also corrosion centers should be removed from the entire surface.
To find out the required size of such gates, it is necessary to conditionally divide them into two parts: a closing opening and a counterweight. The length of the counterweight (cantilever part) should be 35-50% of the width of the required opening. Under the cantilever part, arrangement of the foundation is required in order to withstand the loads created by the gate during movement.

Helpful advice! The standard opening for easy entry through the gate should be 4 meters. Accordingly, the length of the console part will be about 2 meters.
To do this, you need to prepare a channel number 20, the length of the equal console part of the gate. Then dig out a pit adjacent to the support column. Its dimensions should be slightly larger than the dimensions of the channel, and the depth below the level of soil freezing. It is also necessary to create at least two reinforcement cages for binding the channel to the foundation.
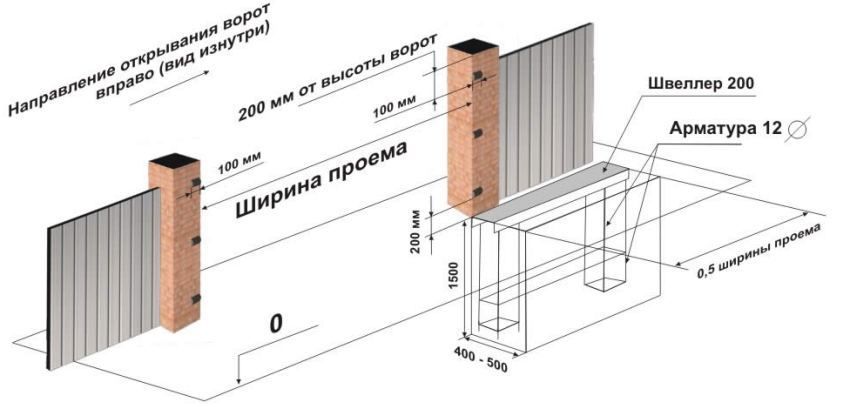
After pouring, the finished foundation takes about a month to finally stand, but after a week it will pick up maximum strength, after which you can begin the installation of the sash.
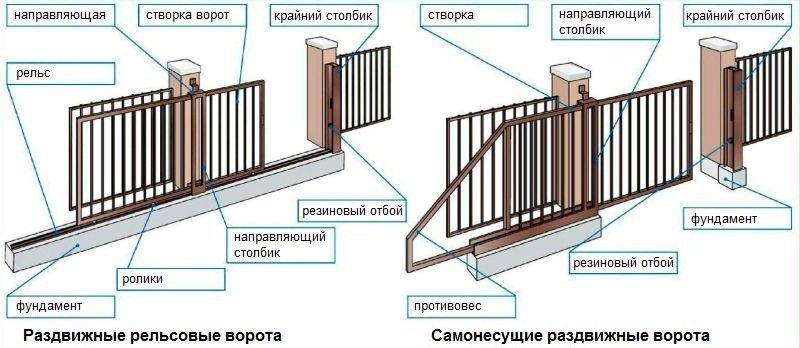
Hardware for cantilever gates, presented on the construction market, is quite diverse. When choosing it, you need to take into account the width of the opening and the weight of the finished sash. Standard set includes:
- 6 meter guide rail;
- two roller bearings;
- end rollers;
- end rollers catchers;
- additional device with 2 rollers;
- plugs for the ends of the beam.

Helpful advice! To work mechanisms did not cause problems, the rollers must be mounted in the same plane.
The kit usually contains the assembly instructions, with its help you can assemble the entire structure of the gate with your own hands. Drawings, photos and videos collected in this article will help to deal in detail with all the nuances.
